3… 2… 1… BLAST OFF!
In this activity, design your own Astrobot using the Little Robot Friends App. Create a custom expression, craft a cool costume, and get ready for a crazy adventure into outer space!
First, you’ll need to get started with a few programs, tools, and materials! Here’s a list of the things you’ll need:
Download the Costume: astro-bot-costume.pdf.
This is an LRF App activity, so make sure you download the App here.
Astro Bot is one of our special characters from the Little Robot Friend Special Edition Character Card Series (#4001). Learn more about this character below!
Always brave, cheerful, and clever, Astrobot was one of the first robots to orbit the moon, mars AND venus! This bot loves to explore new places and return with stories to share about its great adventures! With a taste for adventure, Astro Bot continues its journey into outer space!
Your Astro Bot has three favourite expressions: Happy Hello, Excited, Whoa Whoa Whoa! These are preset expressions you can find in the Little Robot Friends App. To learn how to set these expressions, check out the page “Launching the LRF App”.
Expression can only have up to four sounds!
If you don’t know how to get started in the LRF App, go “here”.
Let’s program a special expression for Astro Bot’s shuttle launch event. This expression will sound like your character is counting down… 3… 2… 1… Blast Off!
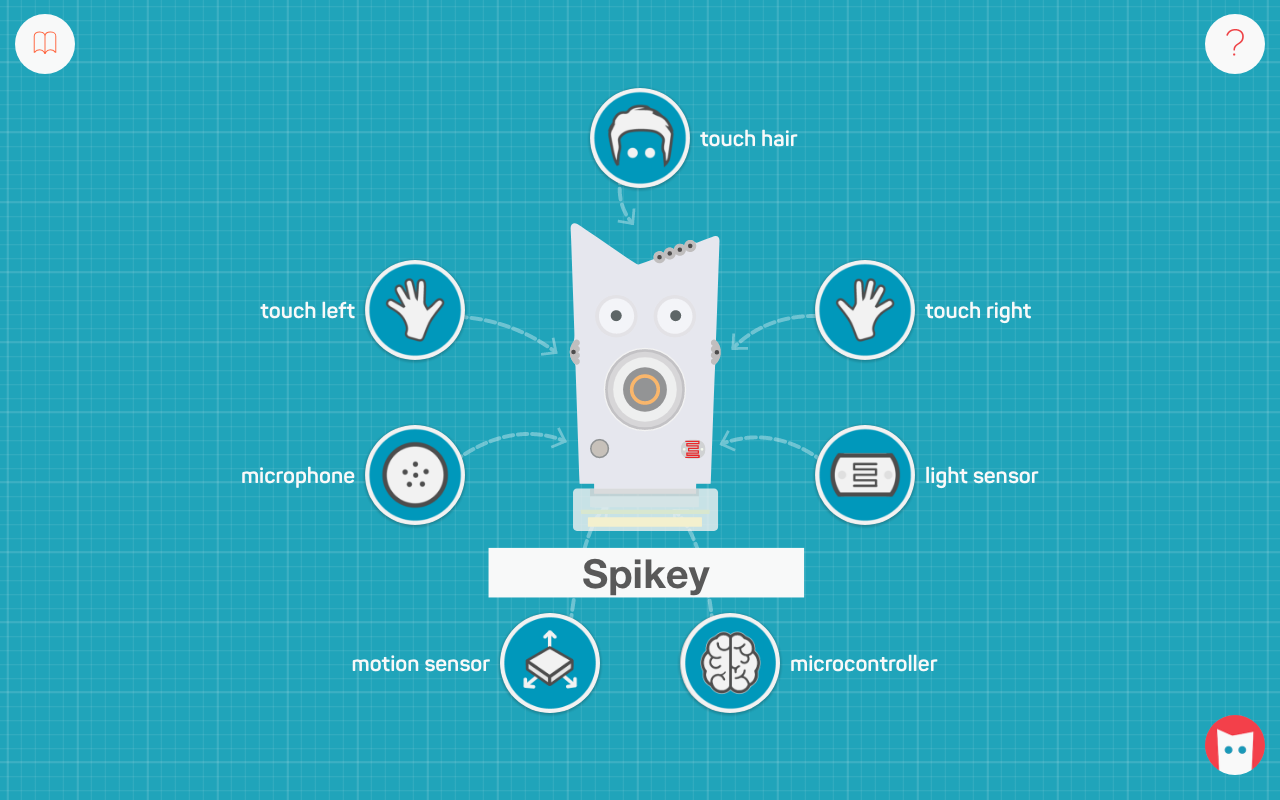
From the sensor menu, choose the motion sensor.
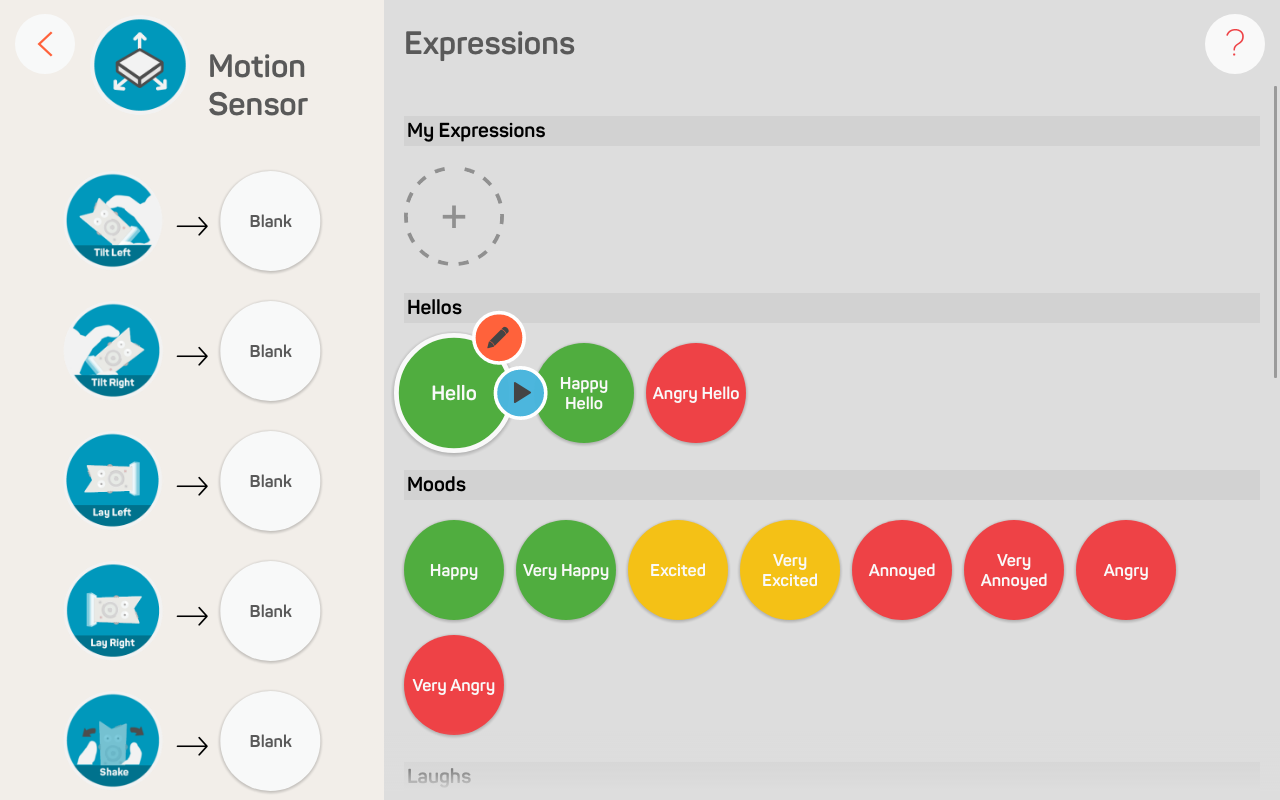
Choose any preset expression. We’ll choose Hello, but it won’t matter which one you select because we’ll be customizing it.
Begin by renaming the expression to 3 2 1 Blast Off.
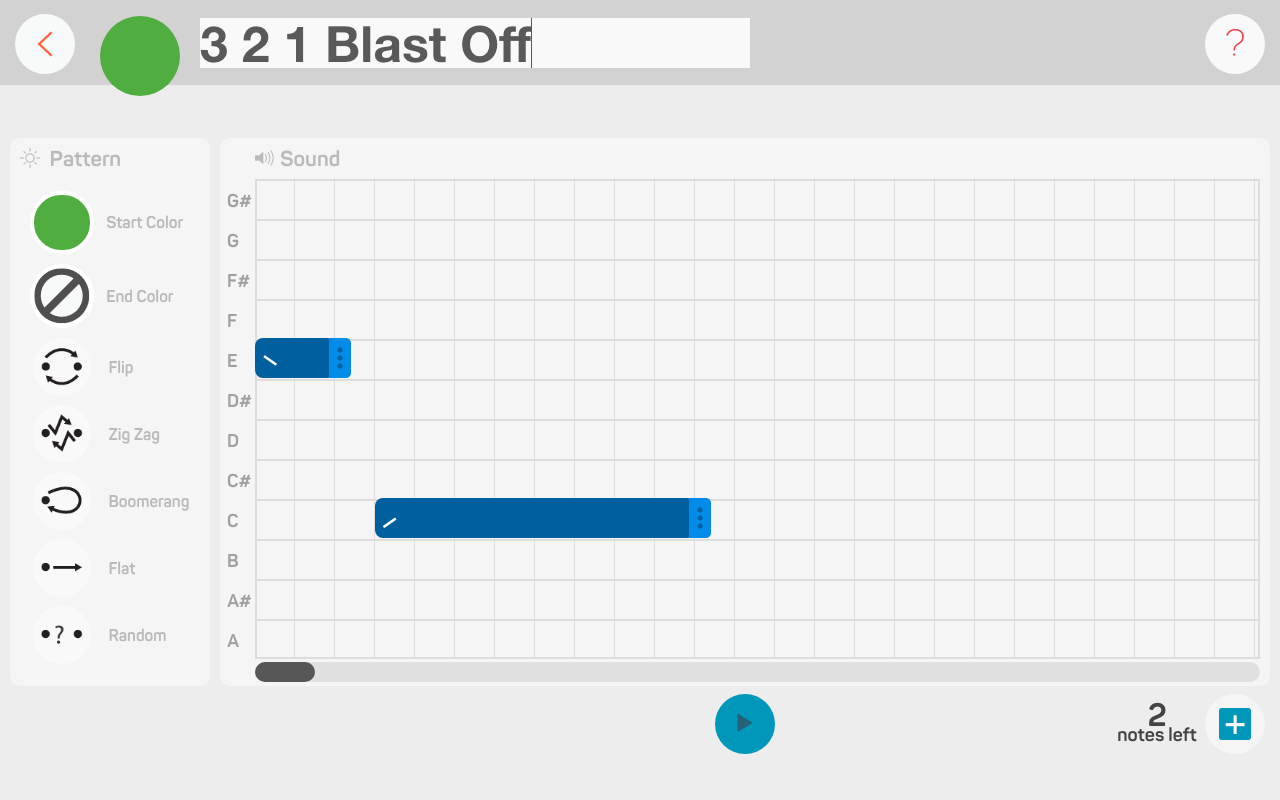
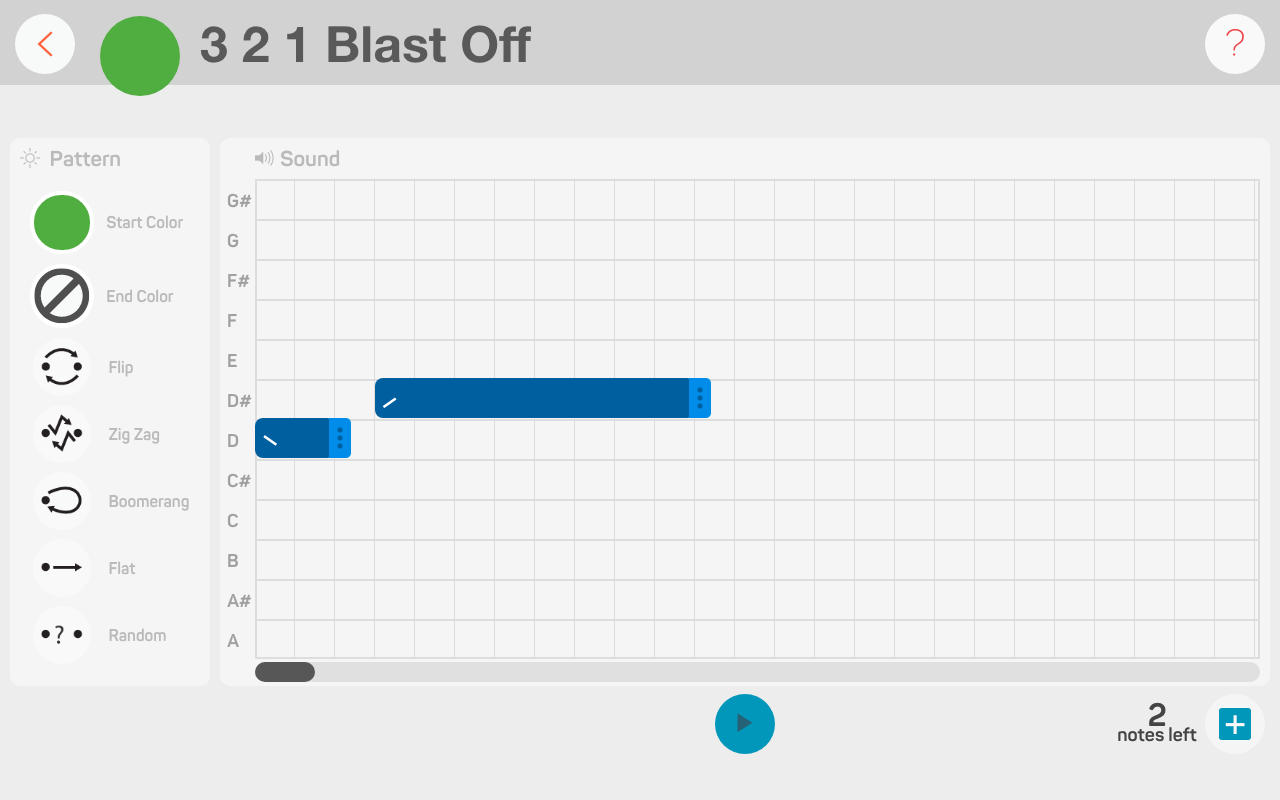
This expression is made up of four sounds. There are already two notes in the Editor. Drag the first sound bar down to note D. Drag the second sound bar up to note D#.
Now, we’ll need to add two more notes. You can do this by clicking on the + button at the bottom. We want the third sound bar on note E and the fourth sound bar on note F#.
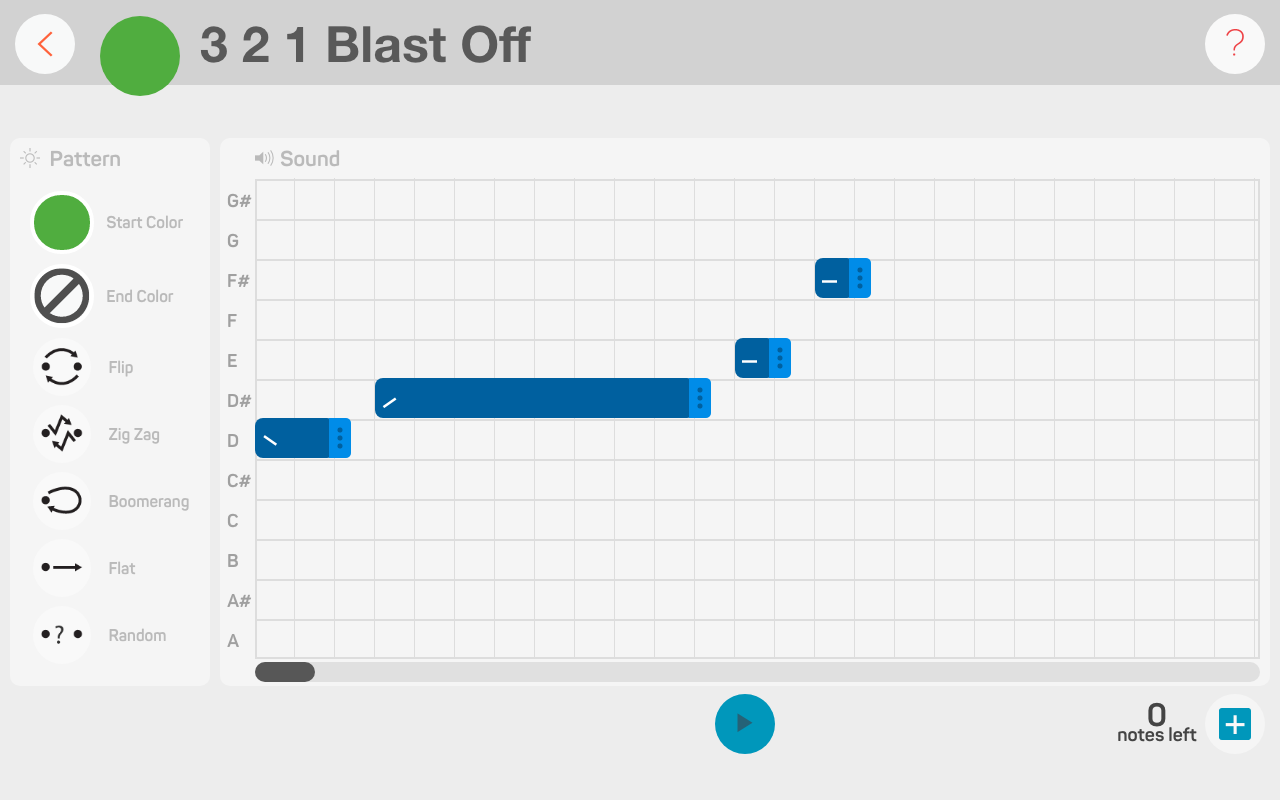
Next, we want to adjust the duration in-between each note. This is important for getting the expressions to sound right on the robot, otherwise it’ll either be too fast or too slow. Drag each sound bar to the right to create eight squares of space in-between each notes.
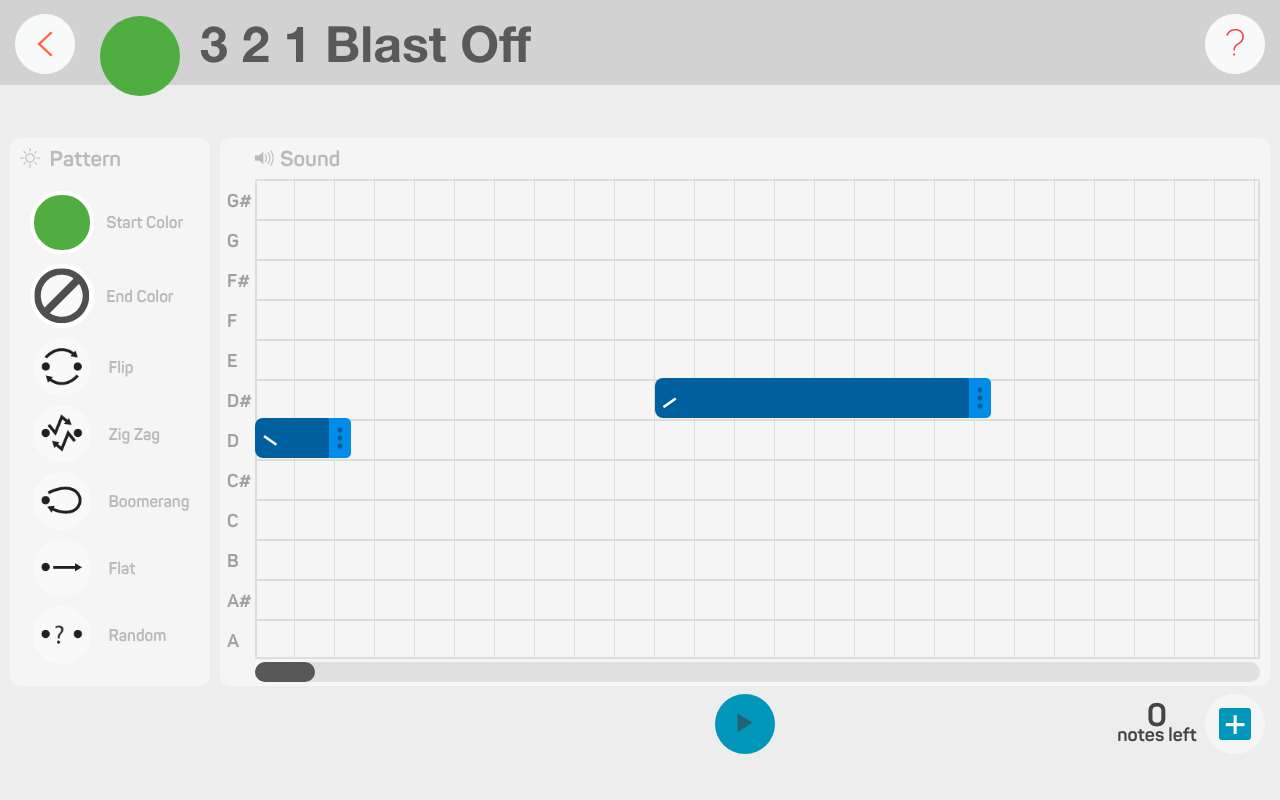
It’s time to customize the note length, intonation, and octave of each sound. Click on the first sound bar (note D). We want to make this sound into a whole note by selecting 1, then change the intonation to rising, and choose the middle octave. Repeat the same process for the second sound bar.
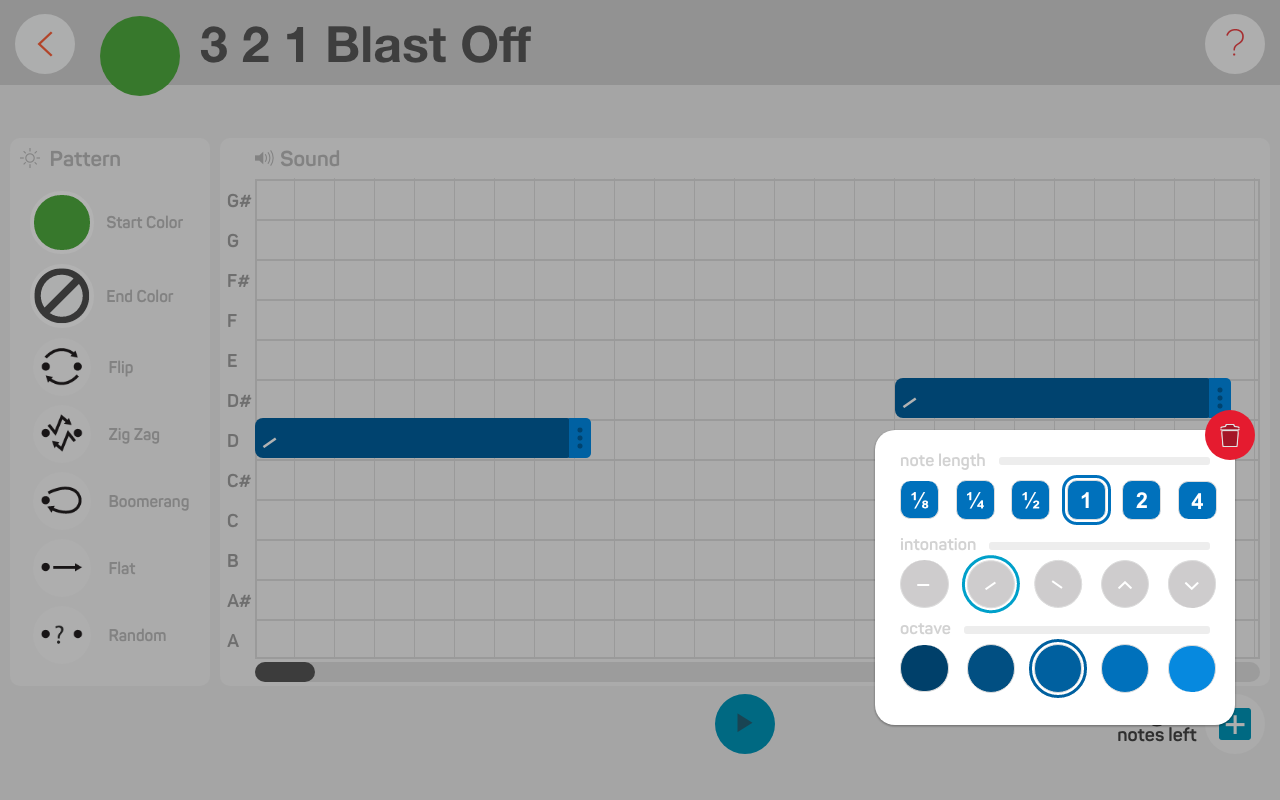
On the third sound bar, we’ll do the same thing as before, but instead of a middle octave, we’ll choose the fourth octave. This will make the third note sound higher. Now we have three notes that will sound like they are climbing! The rising intonation helps add this effect.
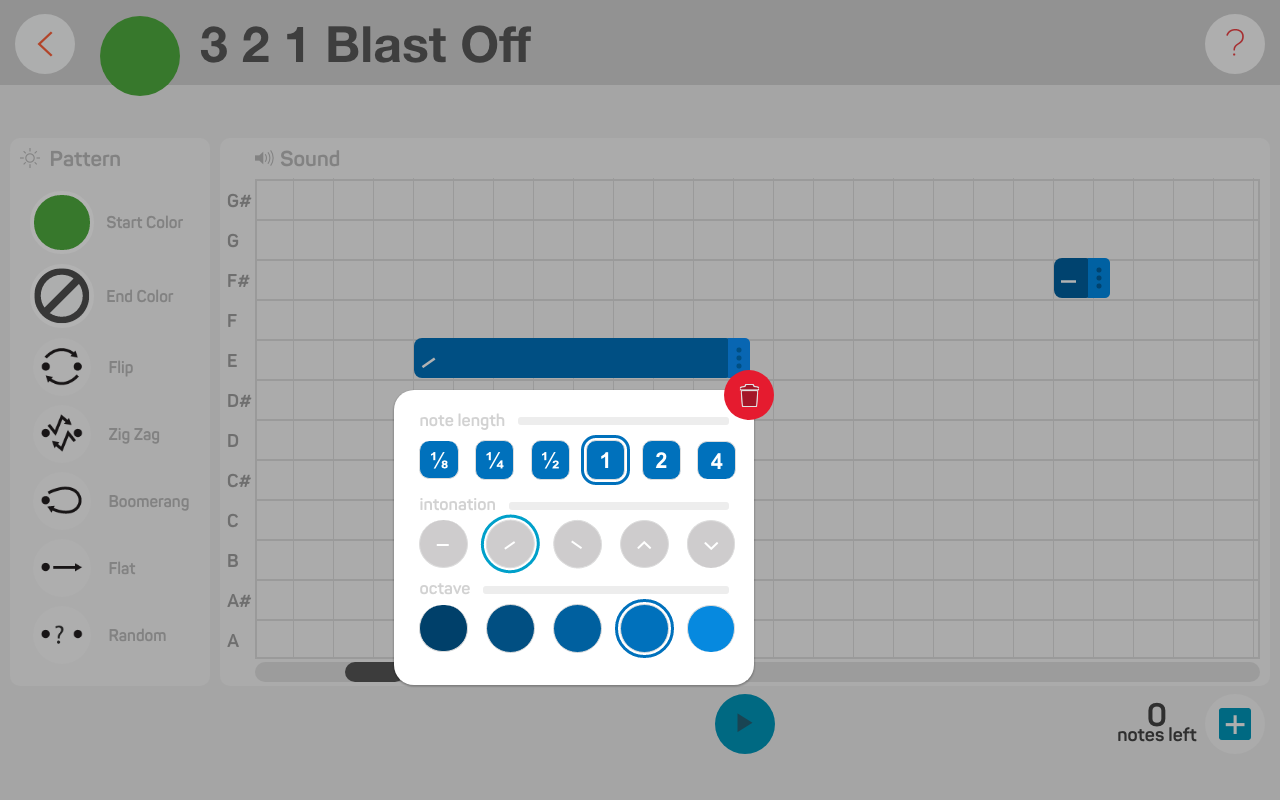
We want the last note to sound special by giving it a ‘BLAST OFF’ effect. Click on the sound bar, select 4 for the note length, peaking for the intonation, and the last octave. A 4 represents a quadruple whole note, which means it’s going to sound really long. The peaking intonation will make the note sound like it is climbing up and descending down, like a rollercoaster! The last octave, in the lightest colour, will give the note the highest pitch.
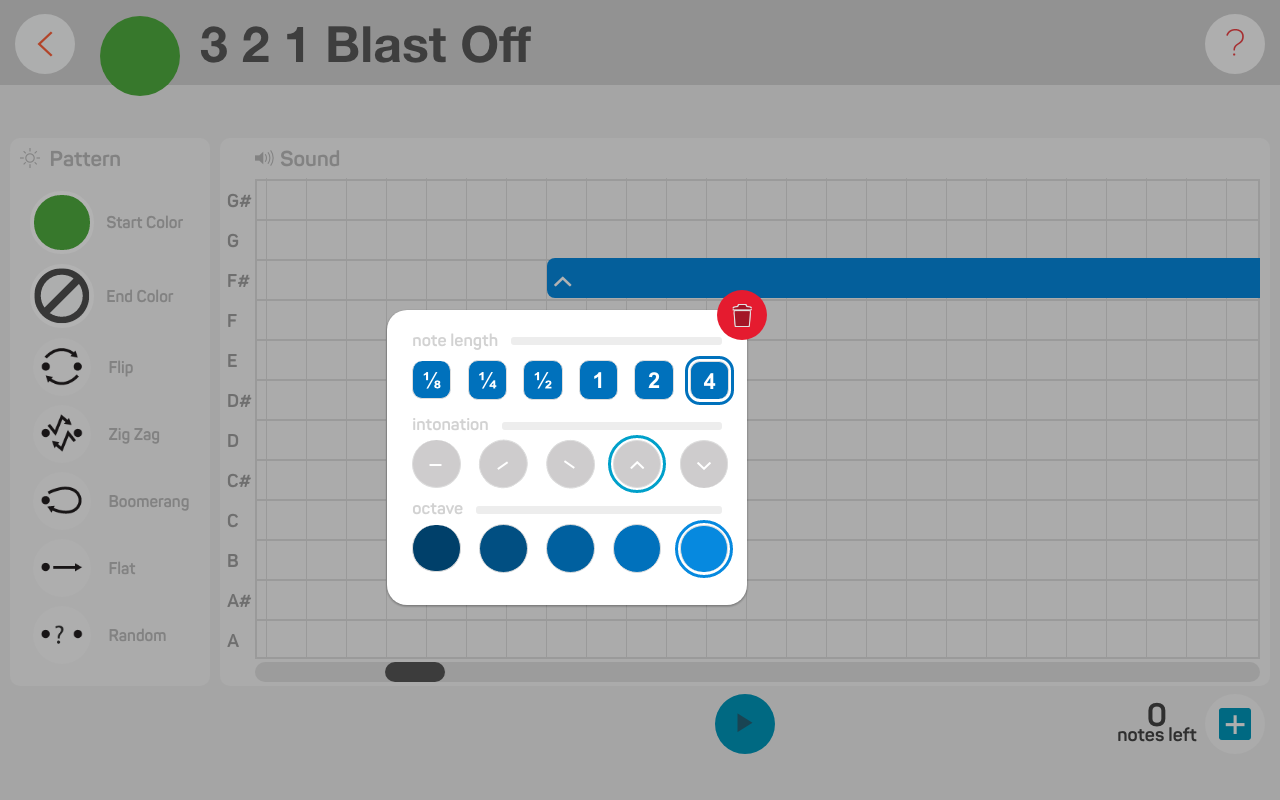
Preview the expression by clicking on the play button. Now, we’ll move on to the robot’s eye patterns!
Expression can only have up to four sounds!
If you don’t know how to get started in the LRF App, go here.
It’s time to customize the colour and light patterns on your robot’s eyes. For the start colour let’s choose blue and for the end colour let’s choose red!
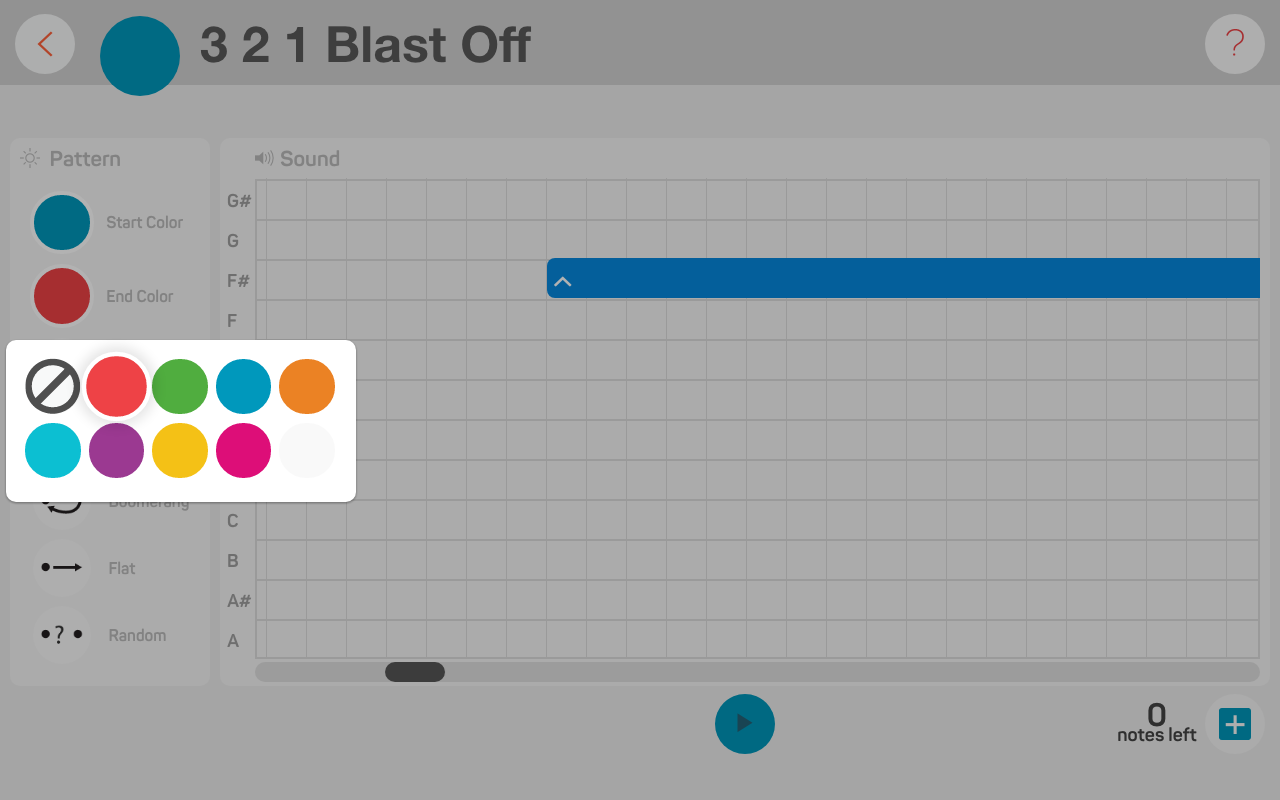
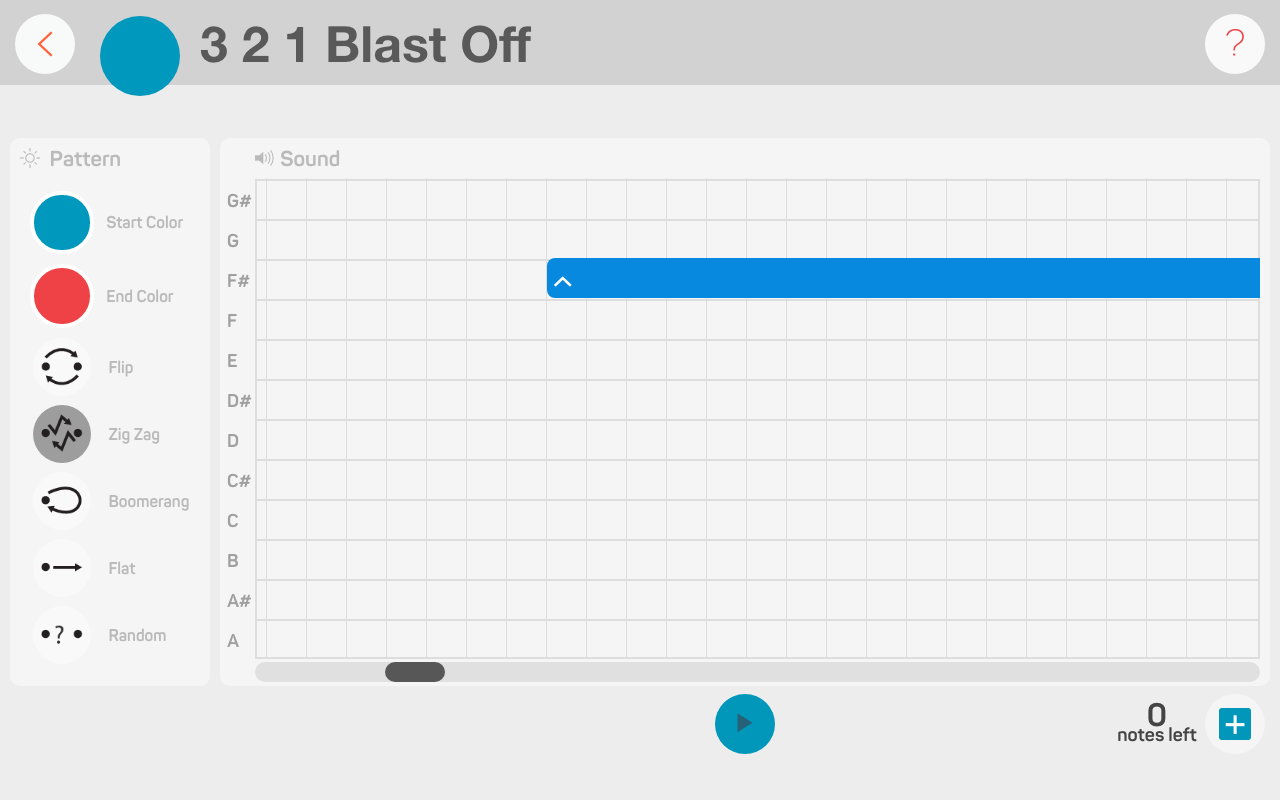
We’re going to add on a transformation to give it an exciting effect that goes with our blast off theme. Choose Zig Zag to make the eye patterns appear more dynamic!
To map your 3 2 1 Blast Off expression to a sensor, exit the Expression Editor by clicking on the back button.
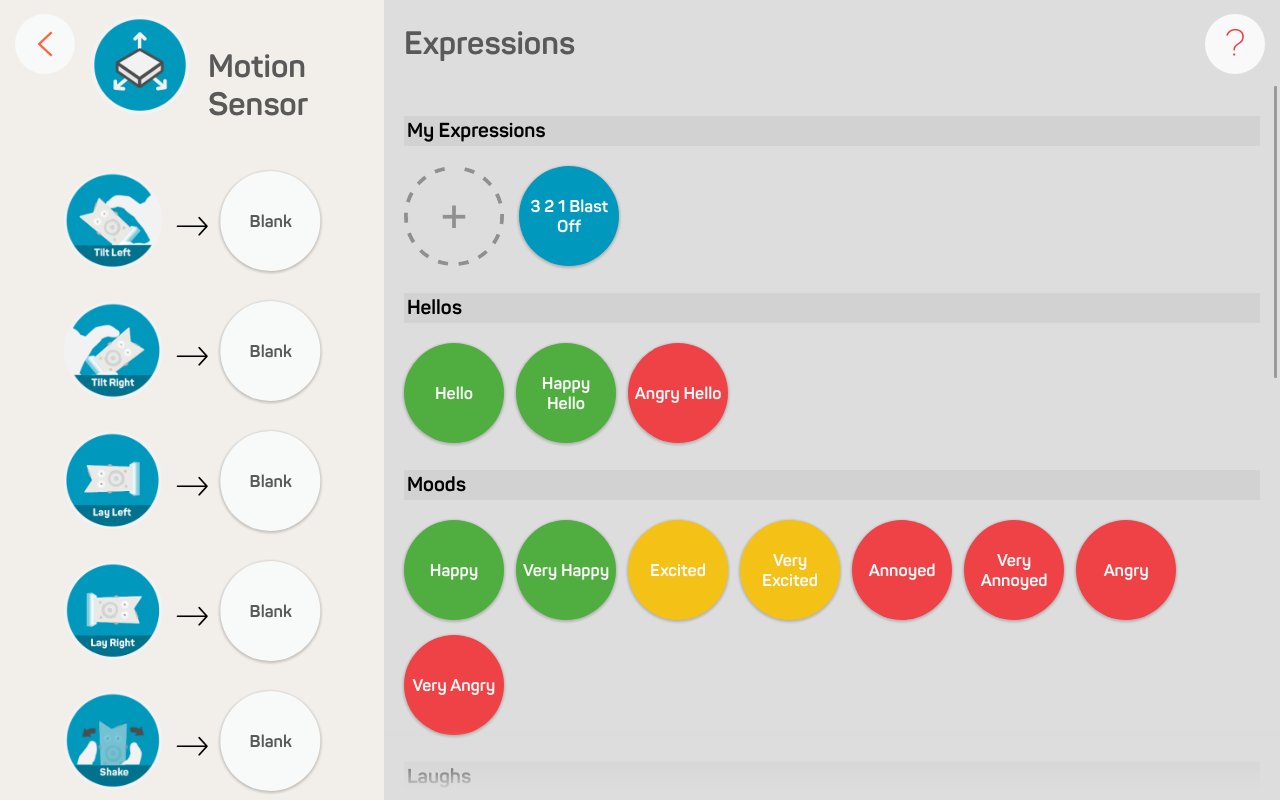
The expression is auto-magically saved in your My Expressions library. Drag-and-drop the expression onto the shake event. Now, give your robot a good shake to trigger the expression!
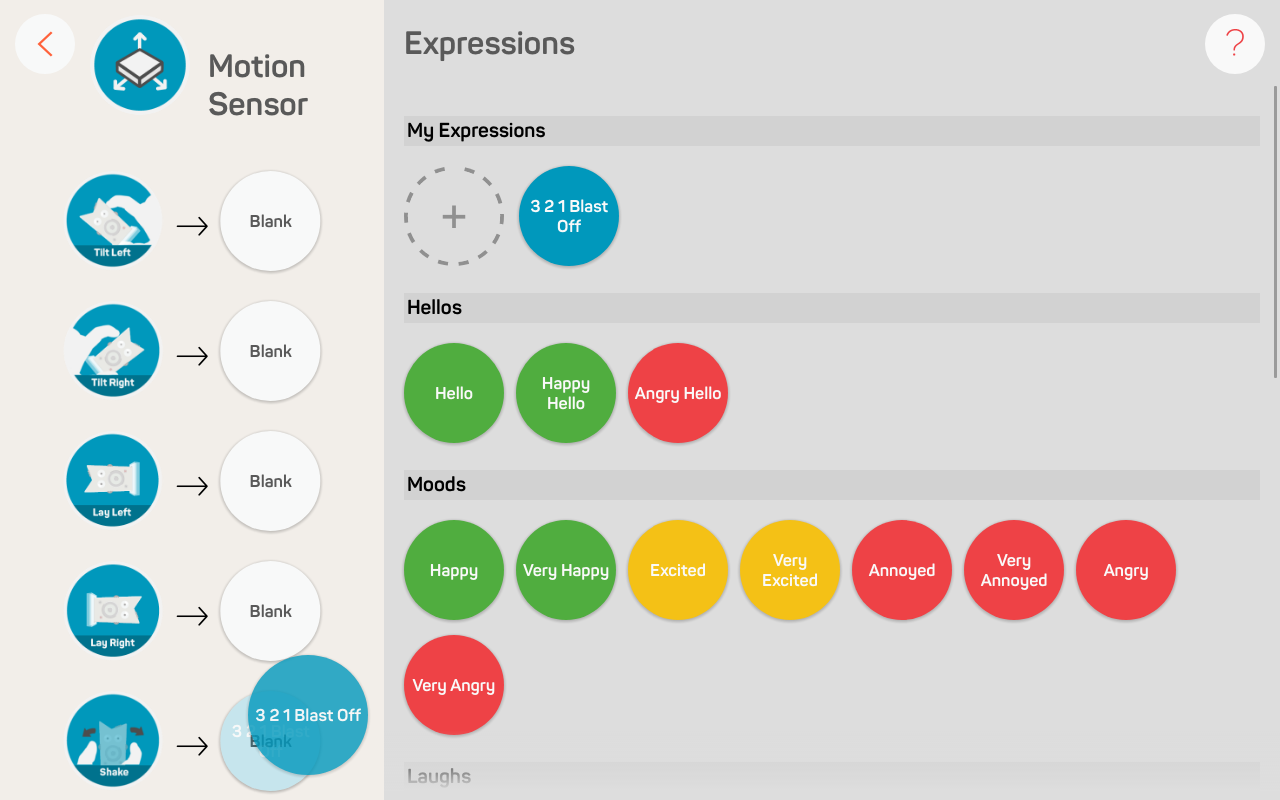
To learn about the robot’s many sensors, go here
Print the costume out on regular paper, or cardstock paper if you want it to last longer. Whip out the pencil crayons, markers, and scissors. Secure the costume onto your robot with a bit of tape and you’re done!
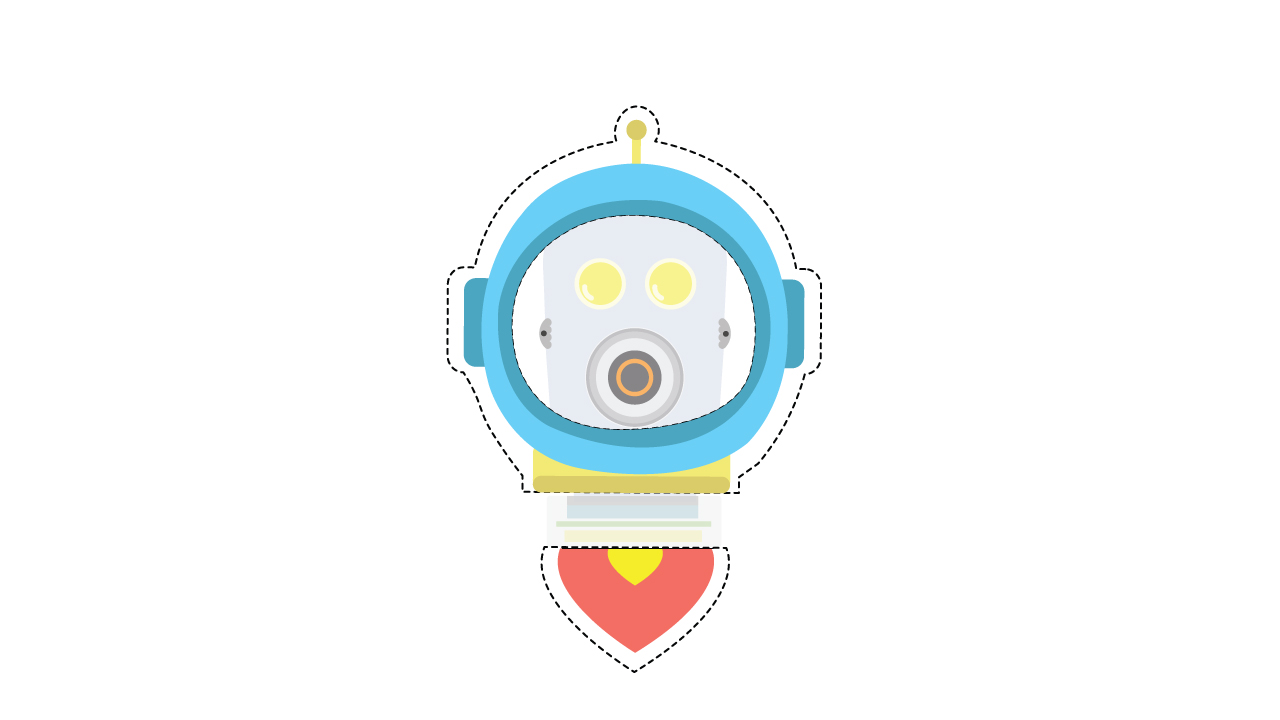
Download your costume, here!
Make sure you print your costume in Actual Size, otherwise it won’t fit!
You’re done creating your Astrobot character. Now take this activity one step further! Level up your Astrobot character with a few of these challenges!
Customize the eye colour and transformation to your preference!
What is Astrobot’s special hello greeting to fellow aliens? Program and map it to one of the hand sensors!
What is Astrobot’s expression when it enters the dark in space? Program and map it to the light sensor!