SURPRISE!
In this activity, design a Birthday Bot to share with your friends and family using the Little Robot Friends App. Create a custom “SURPRISE!” expression, craft a fun costume, and get ready for the best birthday ever.
First, you’ll need to get started with a few programs, tools, and materials! Here’s a list of the things you’ll need:
Download the Costume: birthday-bot-costume.pdf.
This is an LRF App activity, so make sure you download the App here.
Birthday Bot is one of our special characters from the Little Robot Friend Special Edition Character Card Series (#5002). Learn more about this character below!
The life of any party, Birthday Bot lives to celebrate. Going to parties and causing a ruckus is this bot’s ideal weekend. Coming from a long history of party-bots, Birthday Bot loves to dance and sing songs.
Your Birthday Bot has three favourite expressions: Very Excited, Hysterical and Giggle - These are preset expressions you can find in the Little Robot Friends App. To learn how to set these expressions, check out the page here.
Expression can only have up to four sounds!
If you don’t know how to get started in the LRF App, go here.
Let’s program a surprise expression for Birthday Bot. This expression will sound like your character is shouting Surprise! to the birthday boy or girl.
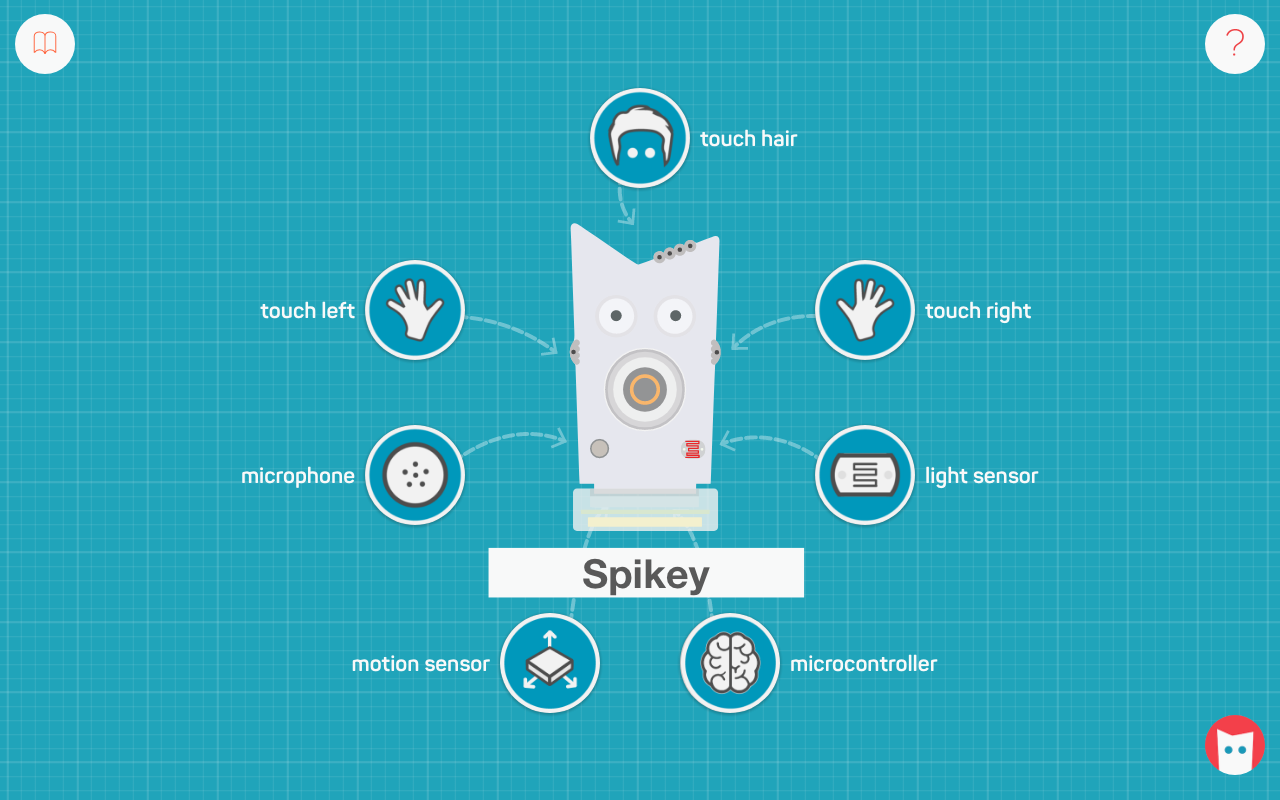
From the sensor menu, choose the sound sensor.
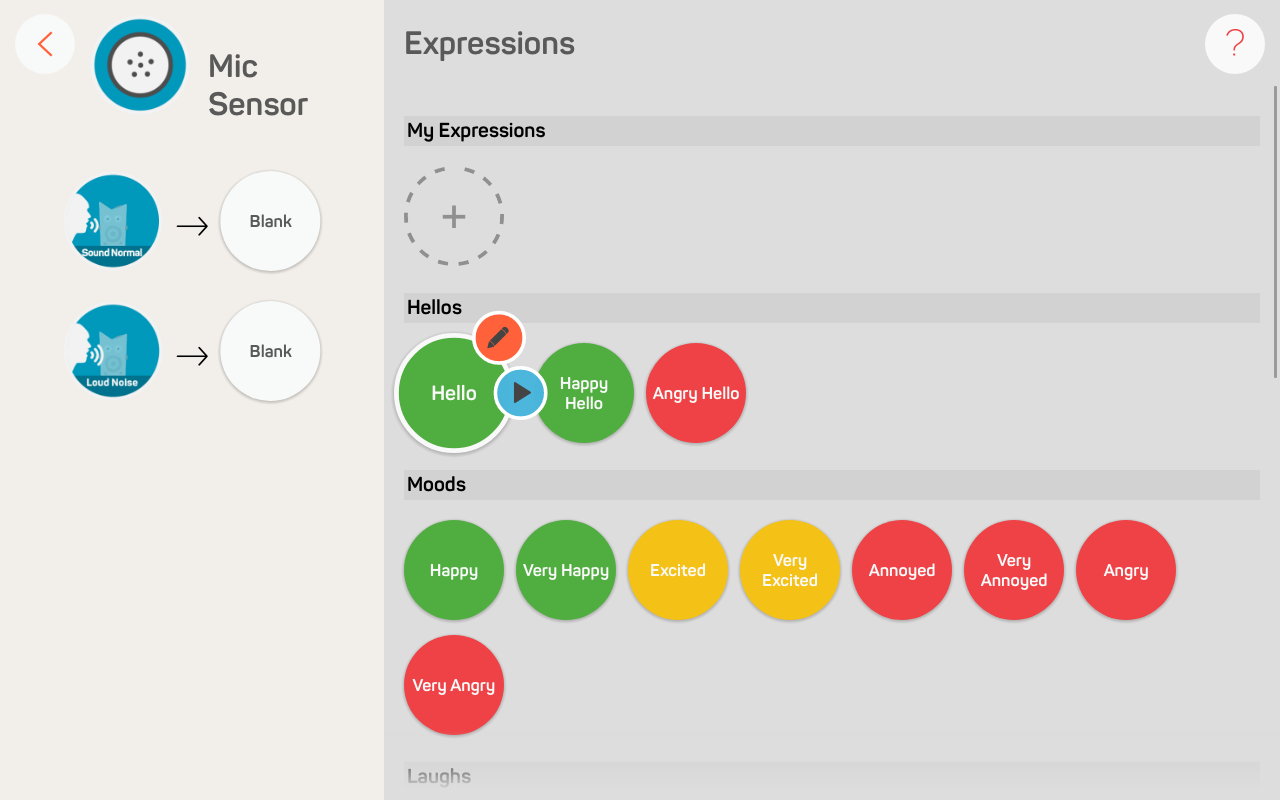
Choose any preset expression. We’ll choose Hello, but it won’t matter which one you select because we’ll be customizing it.
Begin by renaming the expression to Surprise
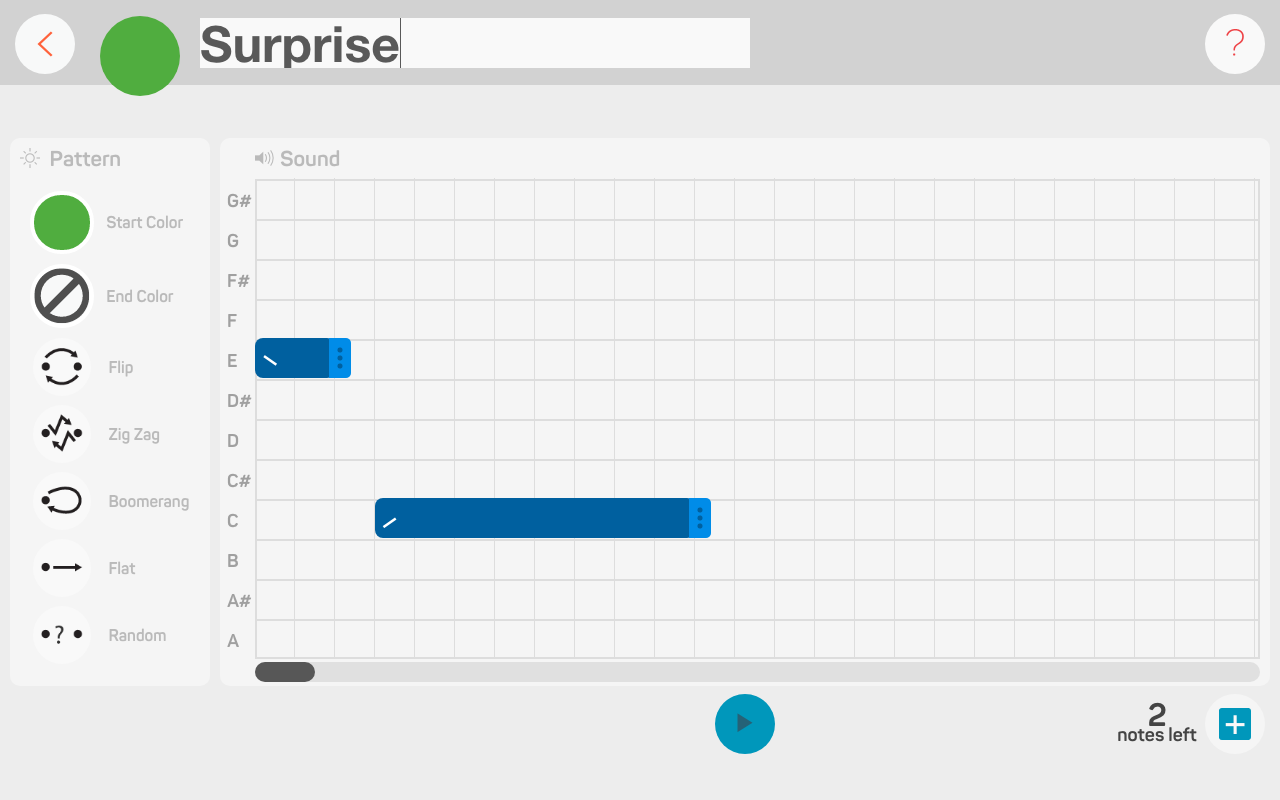
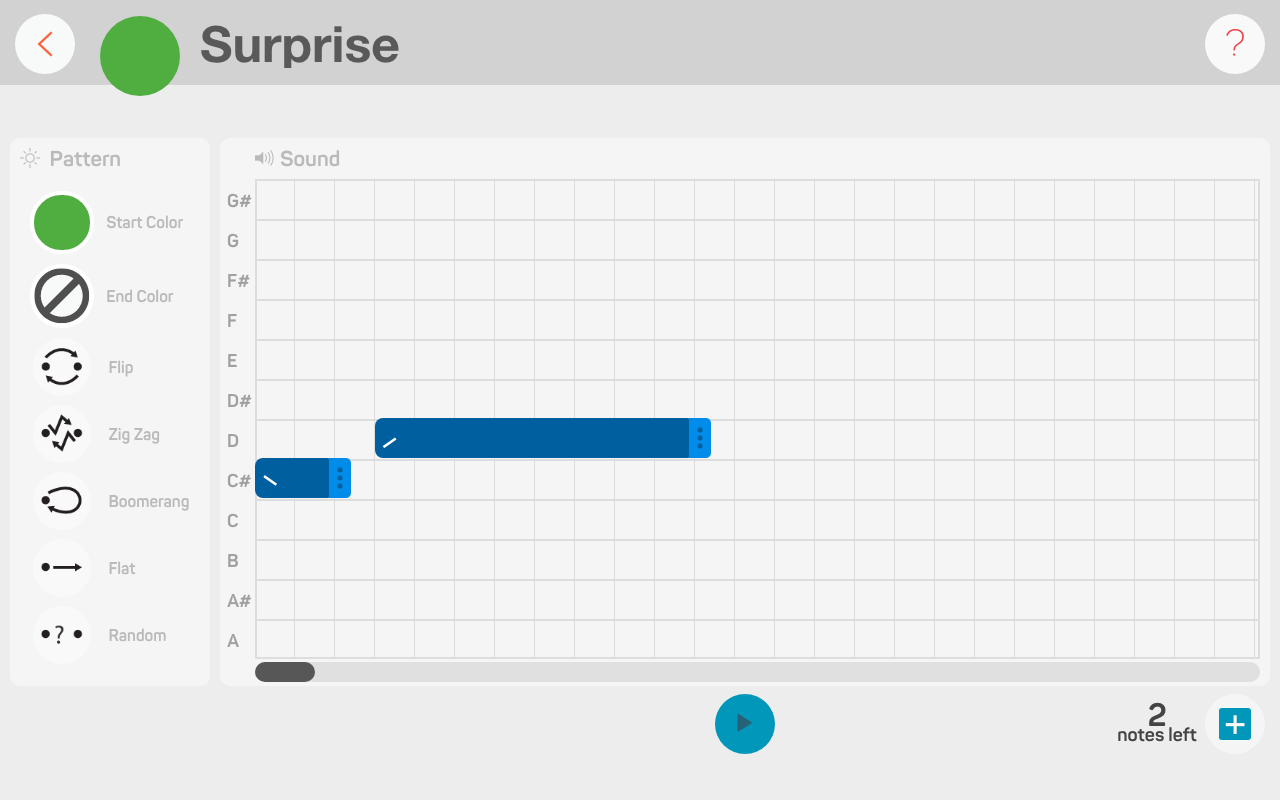
This expression is made up of four sounds. There are already two notes in the Editor. Drag the first sound bar up to note C#. Drag the second sound bar up to note D.
Now, we’ll need to add two more notes. You can do this by clicking on the + button at the bottom.
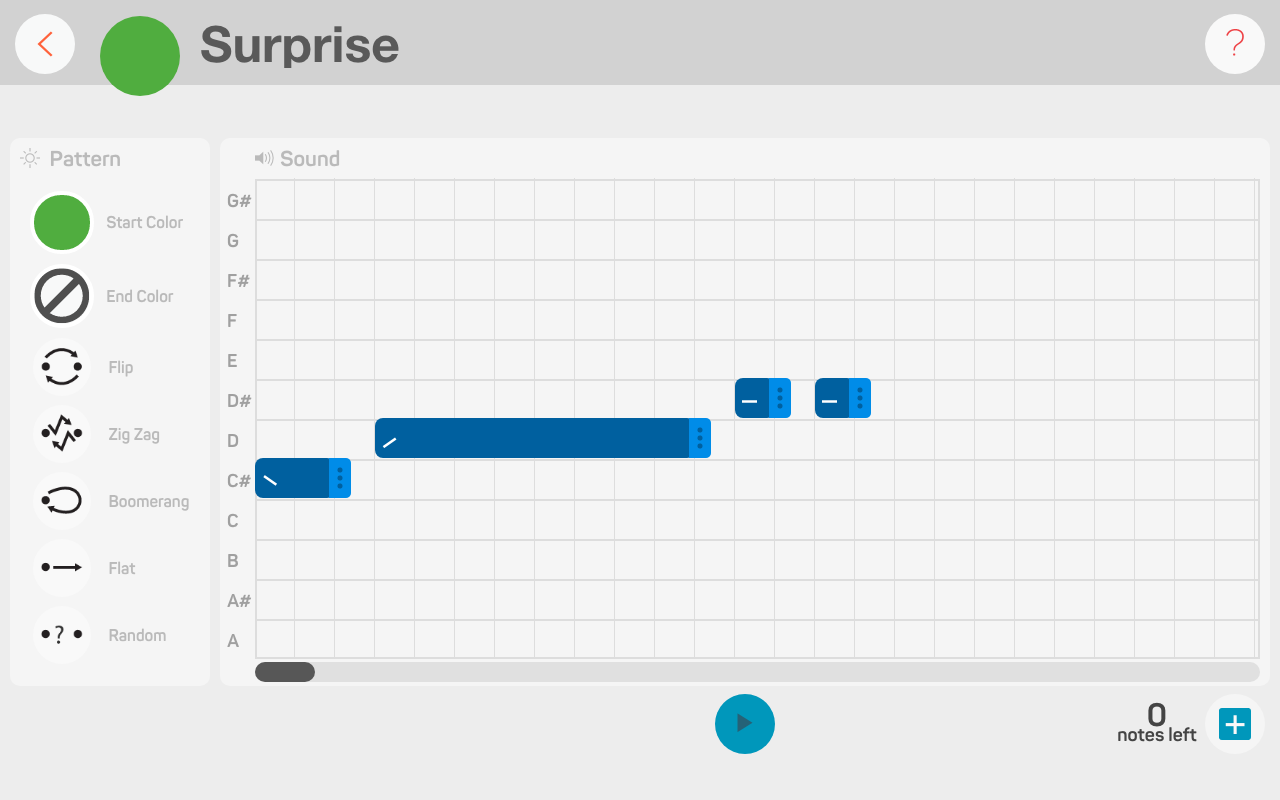
Drag the third sound bar to note D# and the fourth sound bar to note E. The next step is to adjust the duration in-between each note. For this expression we want each note to be one square apart. The notes are already set like this so we don’t need to change anything!
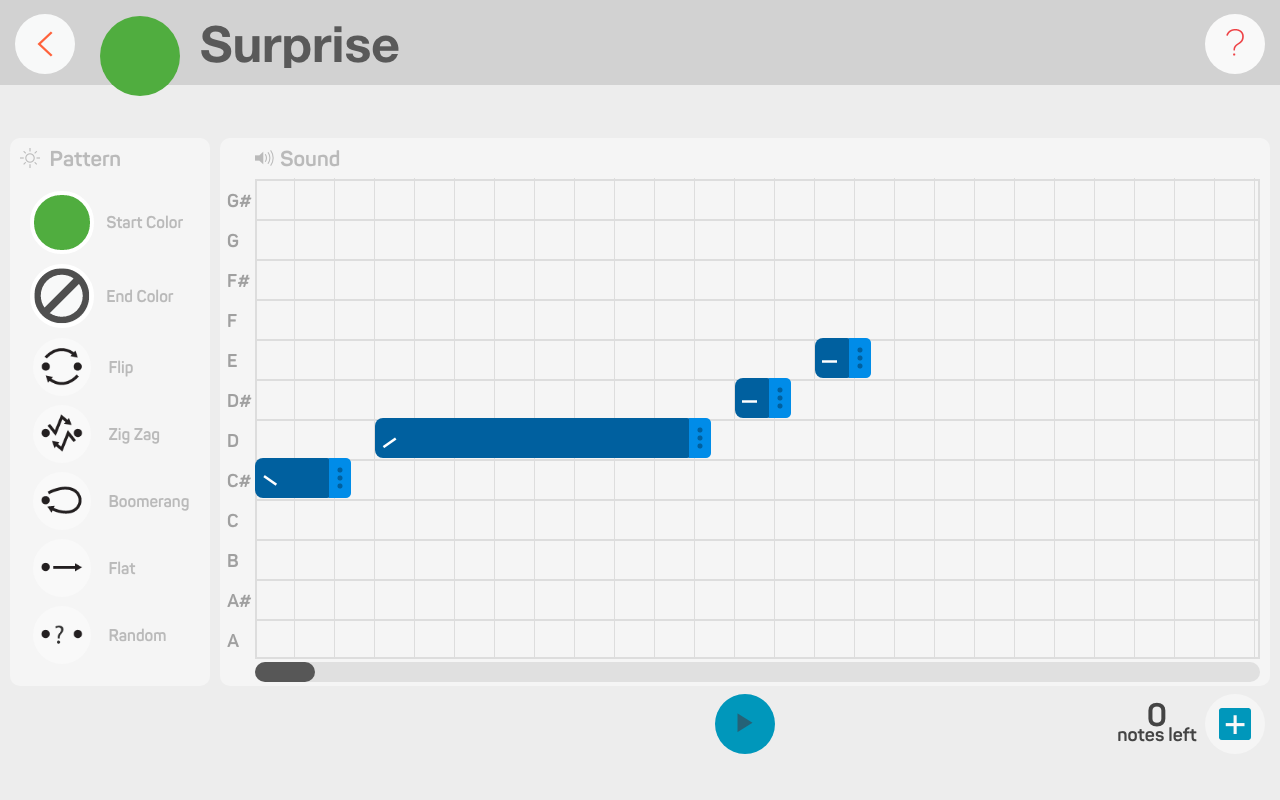
It’s time to customize the note length, intonation, and octave of each sound. Click on the first sound bar (note F#). Change the note length to 1, the intonation to rising, and the octave to the lightest colour.
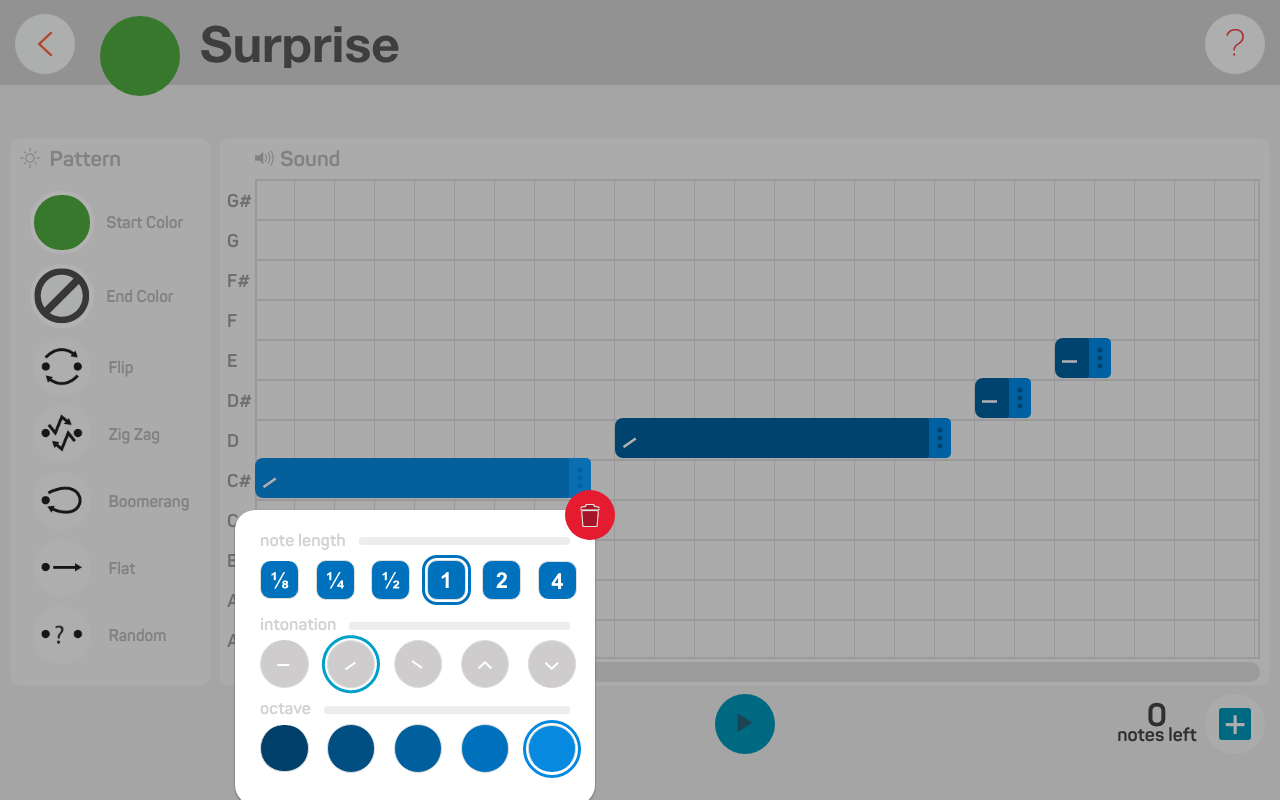
Repeat the previous step for the next two notes. This will make the expression sound like it’s climbing up and up and up!
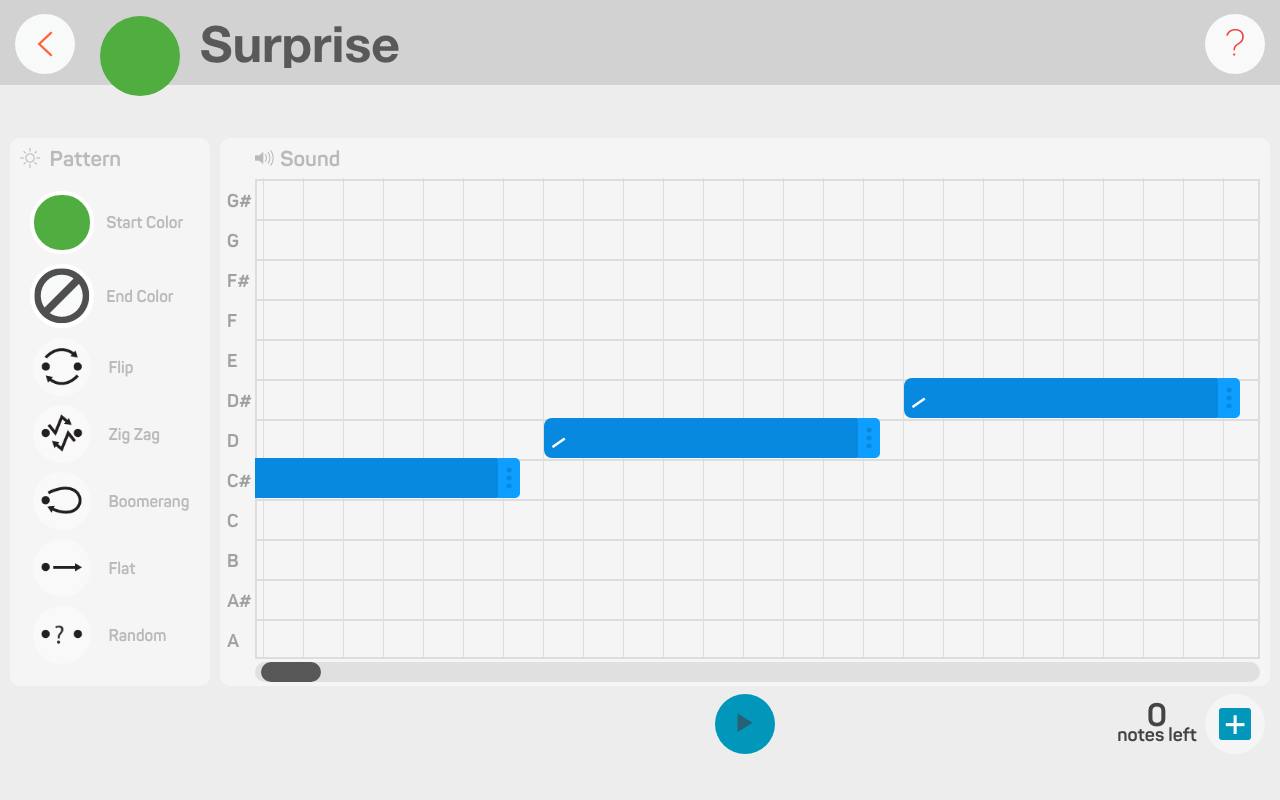
For the last sound bar (note E), change the note length to 4, the intonation to rise, and the octave to the lightest colour.
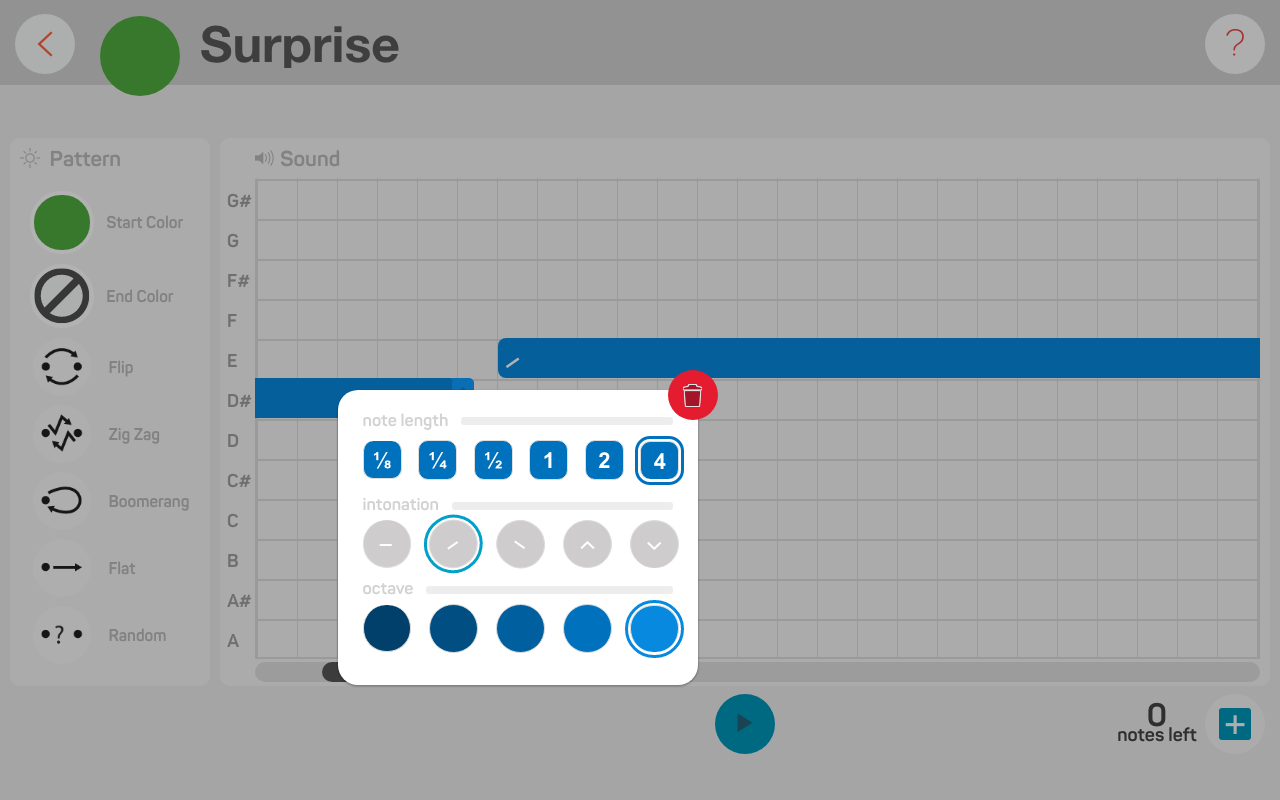
Preview the expression by clicking on the play button. Now, we’ll move on to the robot’s eye patterns!
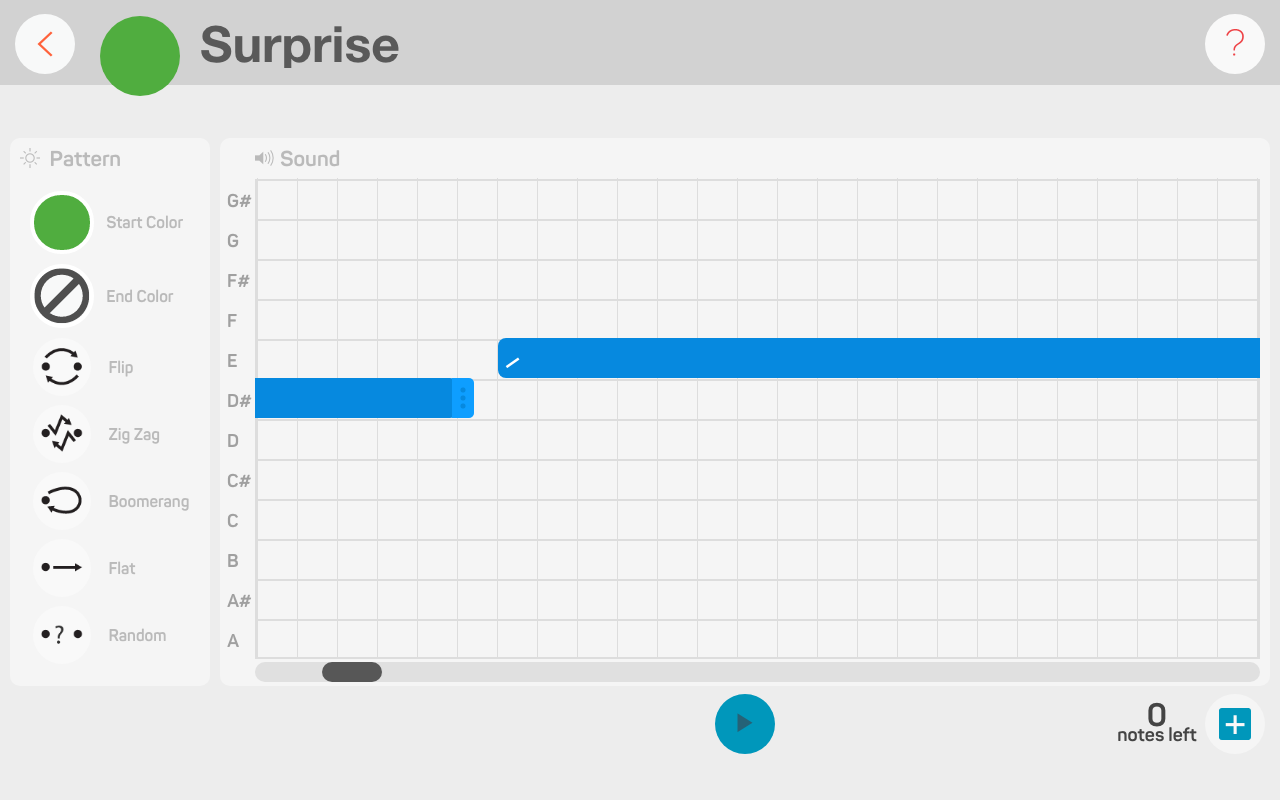
Expression can only have up to four sounds!
If you don’t know how to get started in the LRF App, go here.
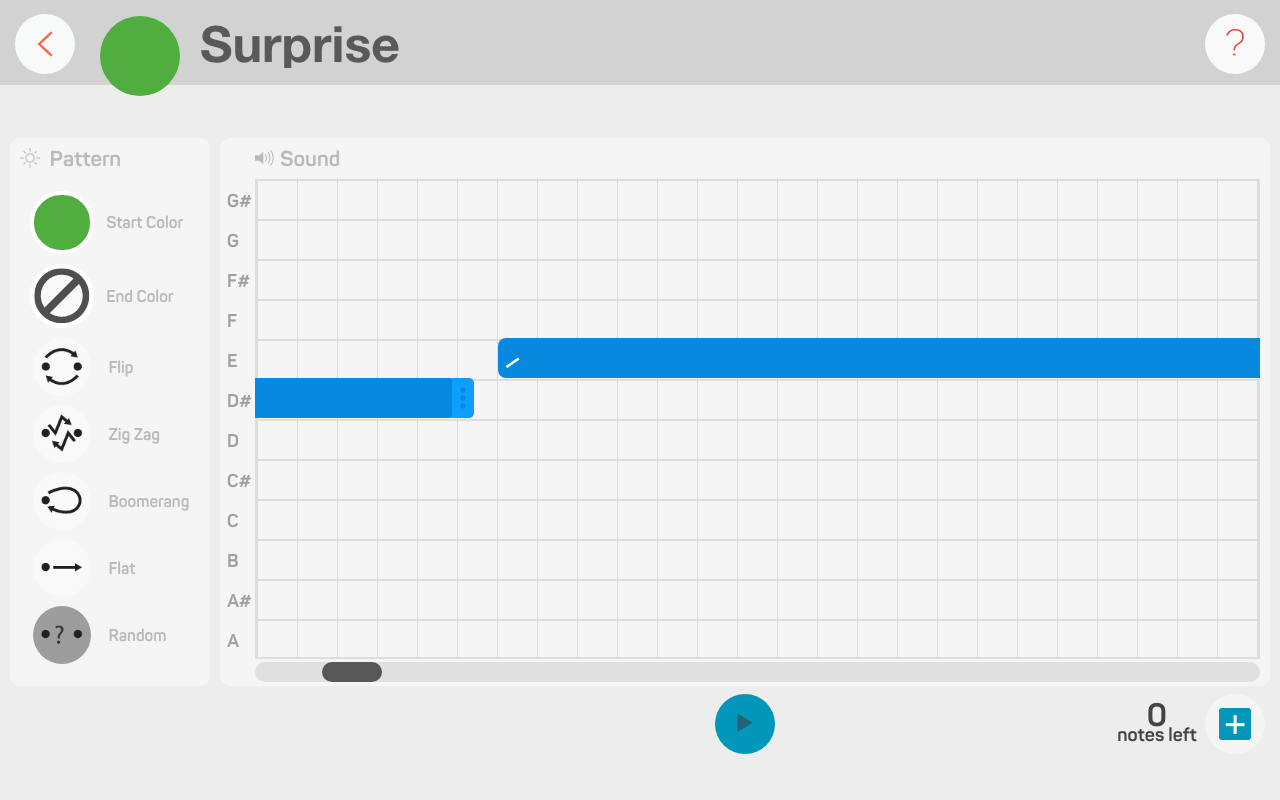
It’s time to customize the colour and light patterns on your robot’s eyes. For this surprise expression, we won’t need to select a start or end colour. Instead, we’re going to choose the random transformation, which will cause the eyes to change lots of different colours.
To map your Surprise expression to a sensor, exit the Expression Editor by clicking on the back button.
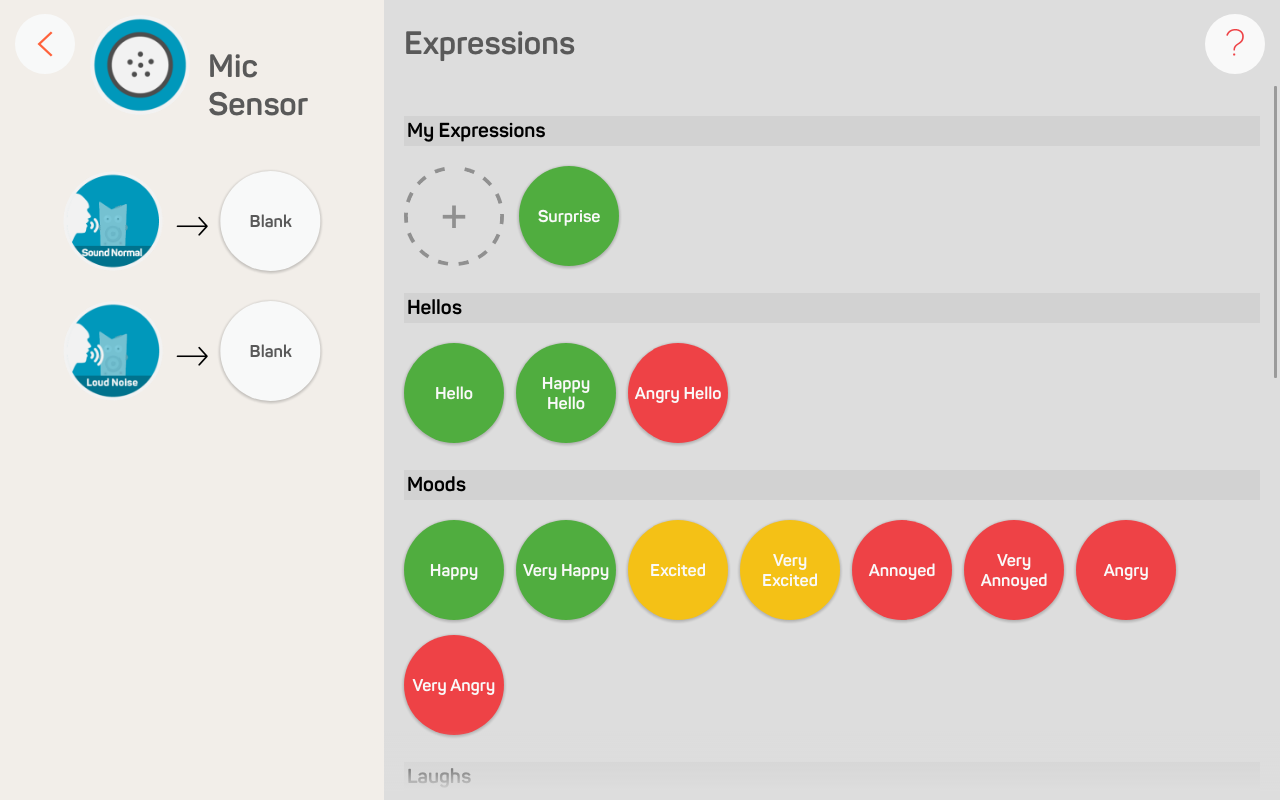
The expression is auto-magically saved in your My Expressions library. Drag-and-drop the expression onto the Loud Noise event. Now, shout SURPRISE into the microphone!
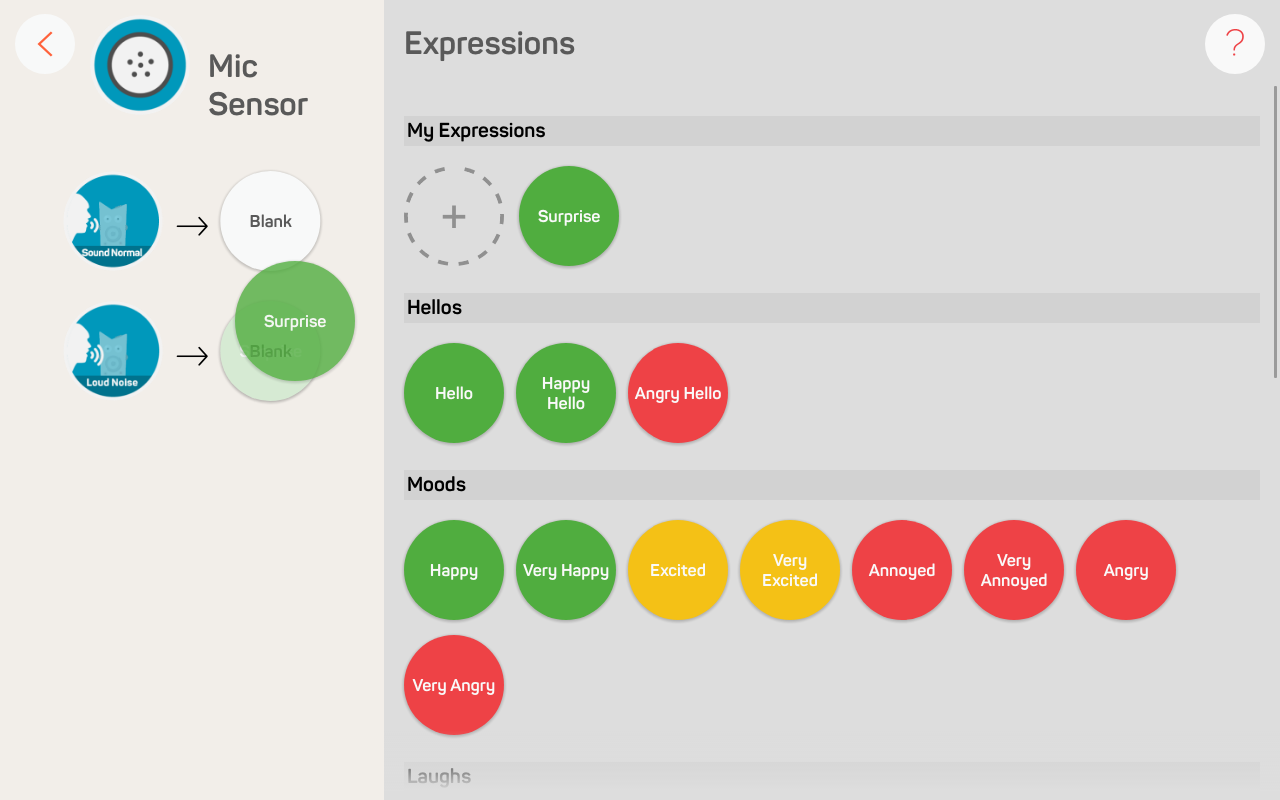
To learn about the robot’s many sensors, go here.
Print the costume out on regular paper, or cardstock paper if you want it to last longer. Whip out the pencil crayons, markers, and scissors. Secure the costume onto your robot with a bit of tape and you’re done!
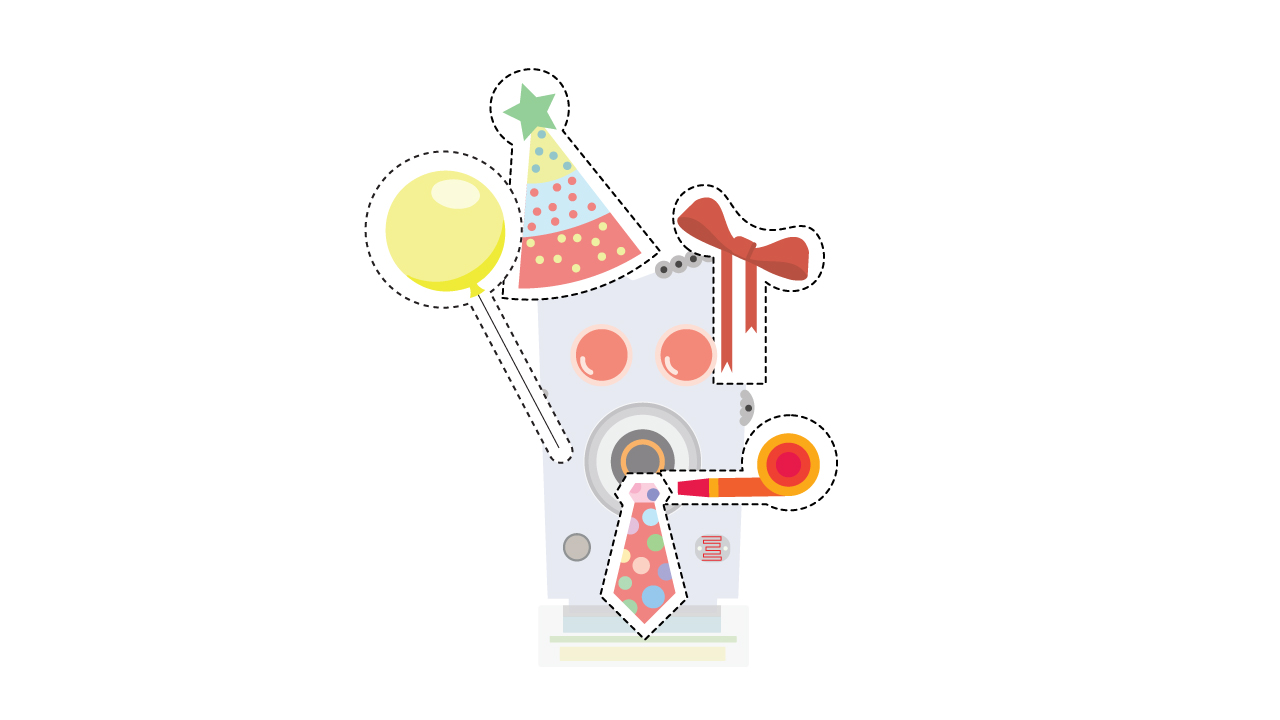
Download your costume, here.!
Make sure you print your costume in Actual Size, otherwise it won’t fit!
You’re done creating your Birthday Bot character. Now take this activity one step further! Make this birthday celebration even better with a few fun challenges.
Customize the eye colour and transformation to your preference!
How does Birthday Bot react after it has stuffed its face with cake? Program an expression!
Level up by trying the Birthday Candle Bot Arduino Trick. See if you can program your robot to sing Happy Birthday and transform into a flickering candle using C & C++.