It’s time to learn how to upload your first program onto your robots in Arduino. We’ll use one of the programs from our Examples folder to show you how to do this.
Make sure you’ve reviewed the How To Read An Arduino Sketch guide. This will help you understand the anatomy of an Arduino Sketch before you upload programs.
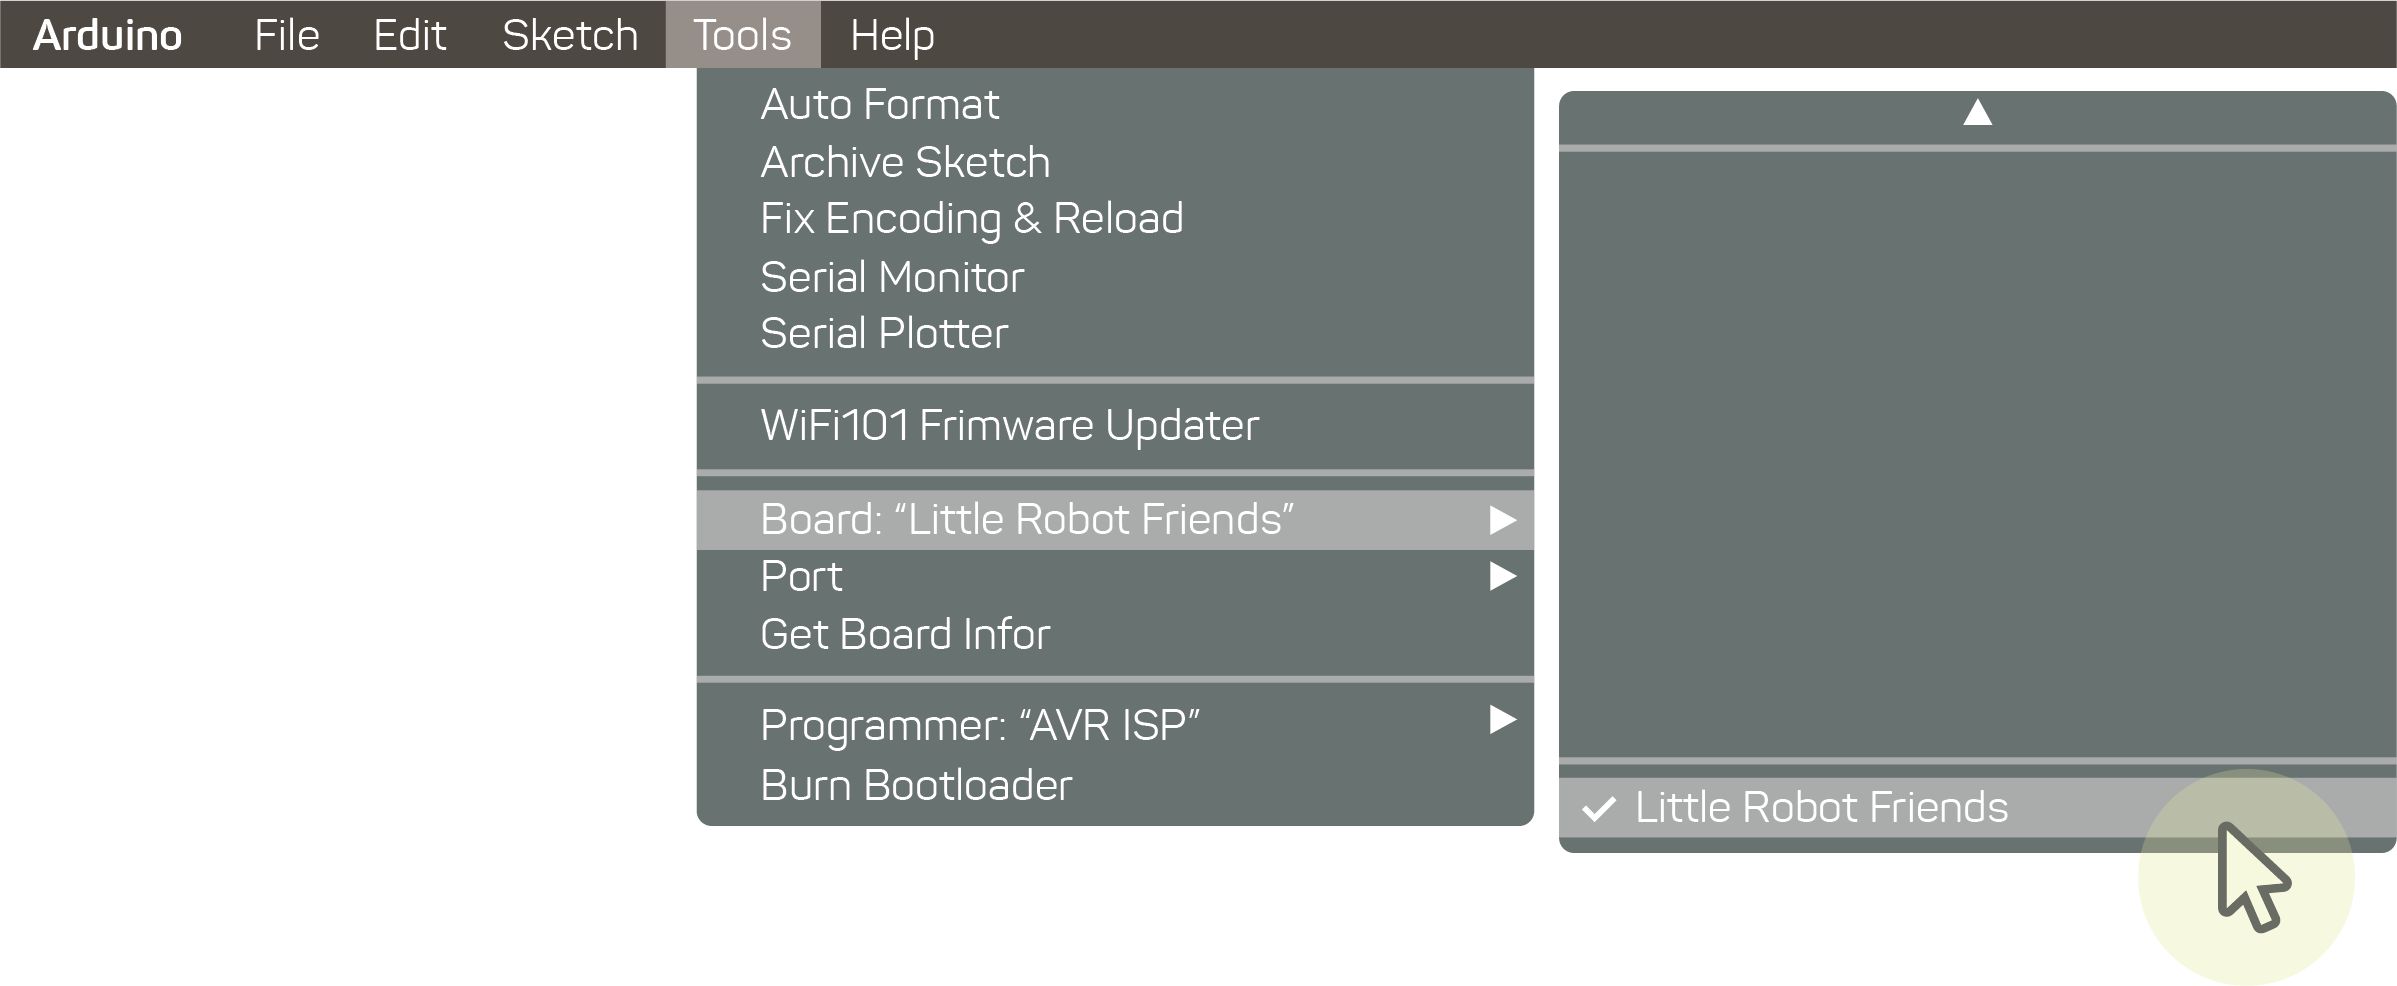
First, check that your board selected is “Little Robot Friends”.

Next, check that your serial port is connected to Little Robot Friends. It might also be called /dev/cu.usbserial-XXXXXX or COM3 or COM4. This is how the robot communicates with Arduino. It’s very important not to forget this step, otherwise you won’t be able to upload anything onto your robot.

Your board should not be connected to Little Robot Friends (Analysis).
If you can’t find the Little Robot Friends serial port, your ports might be busy!
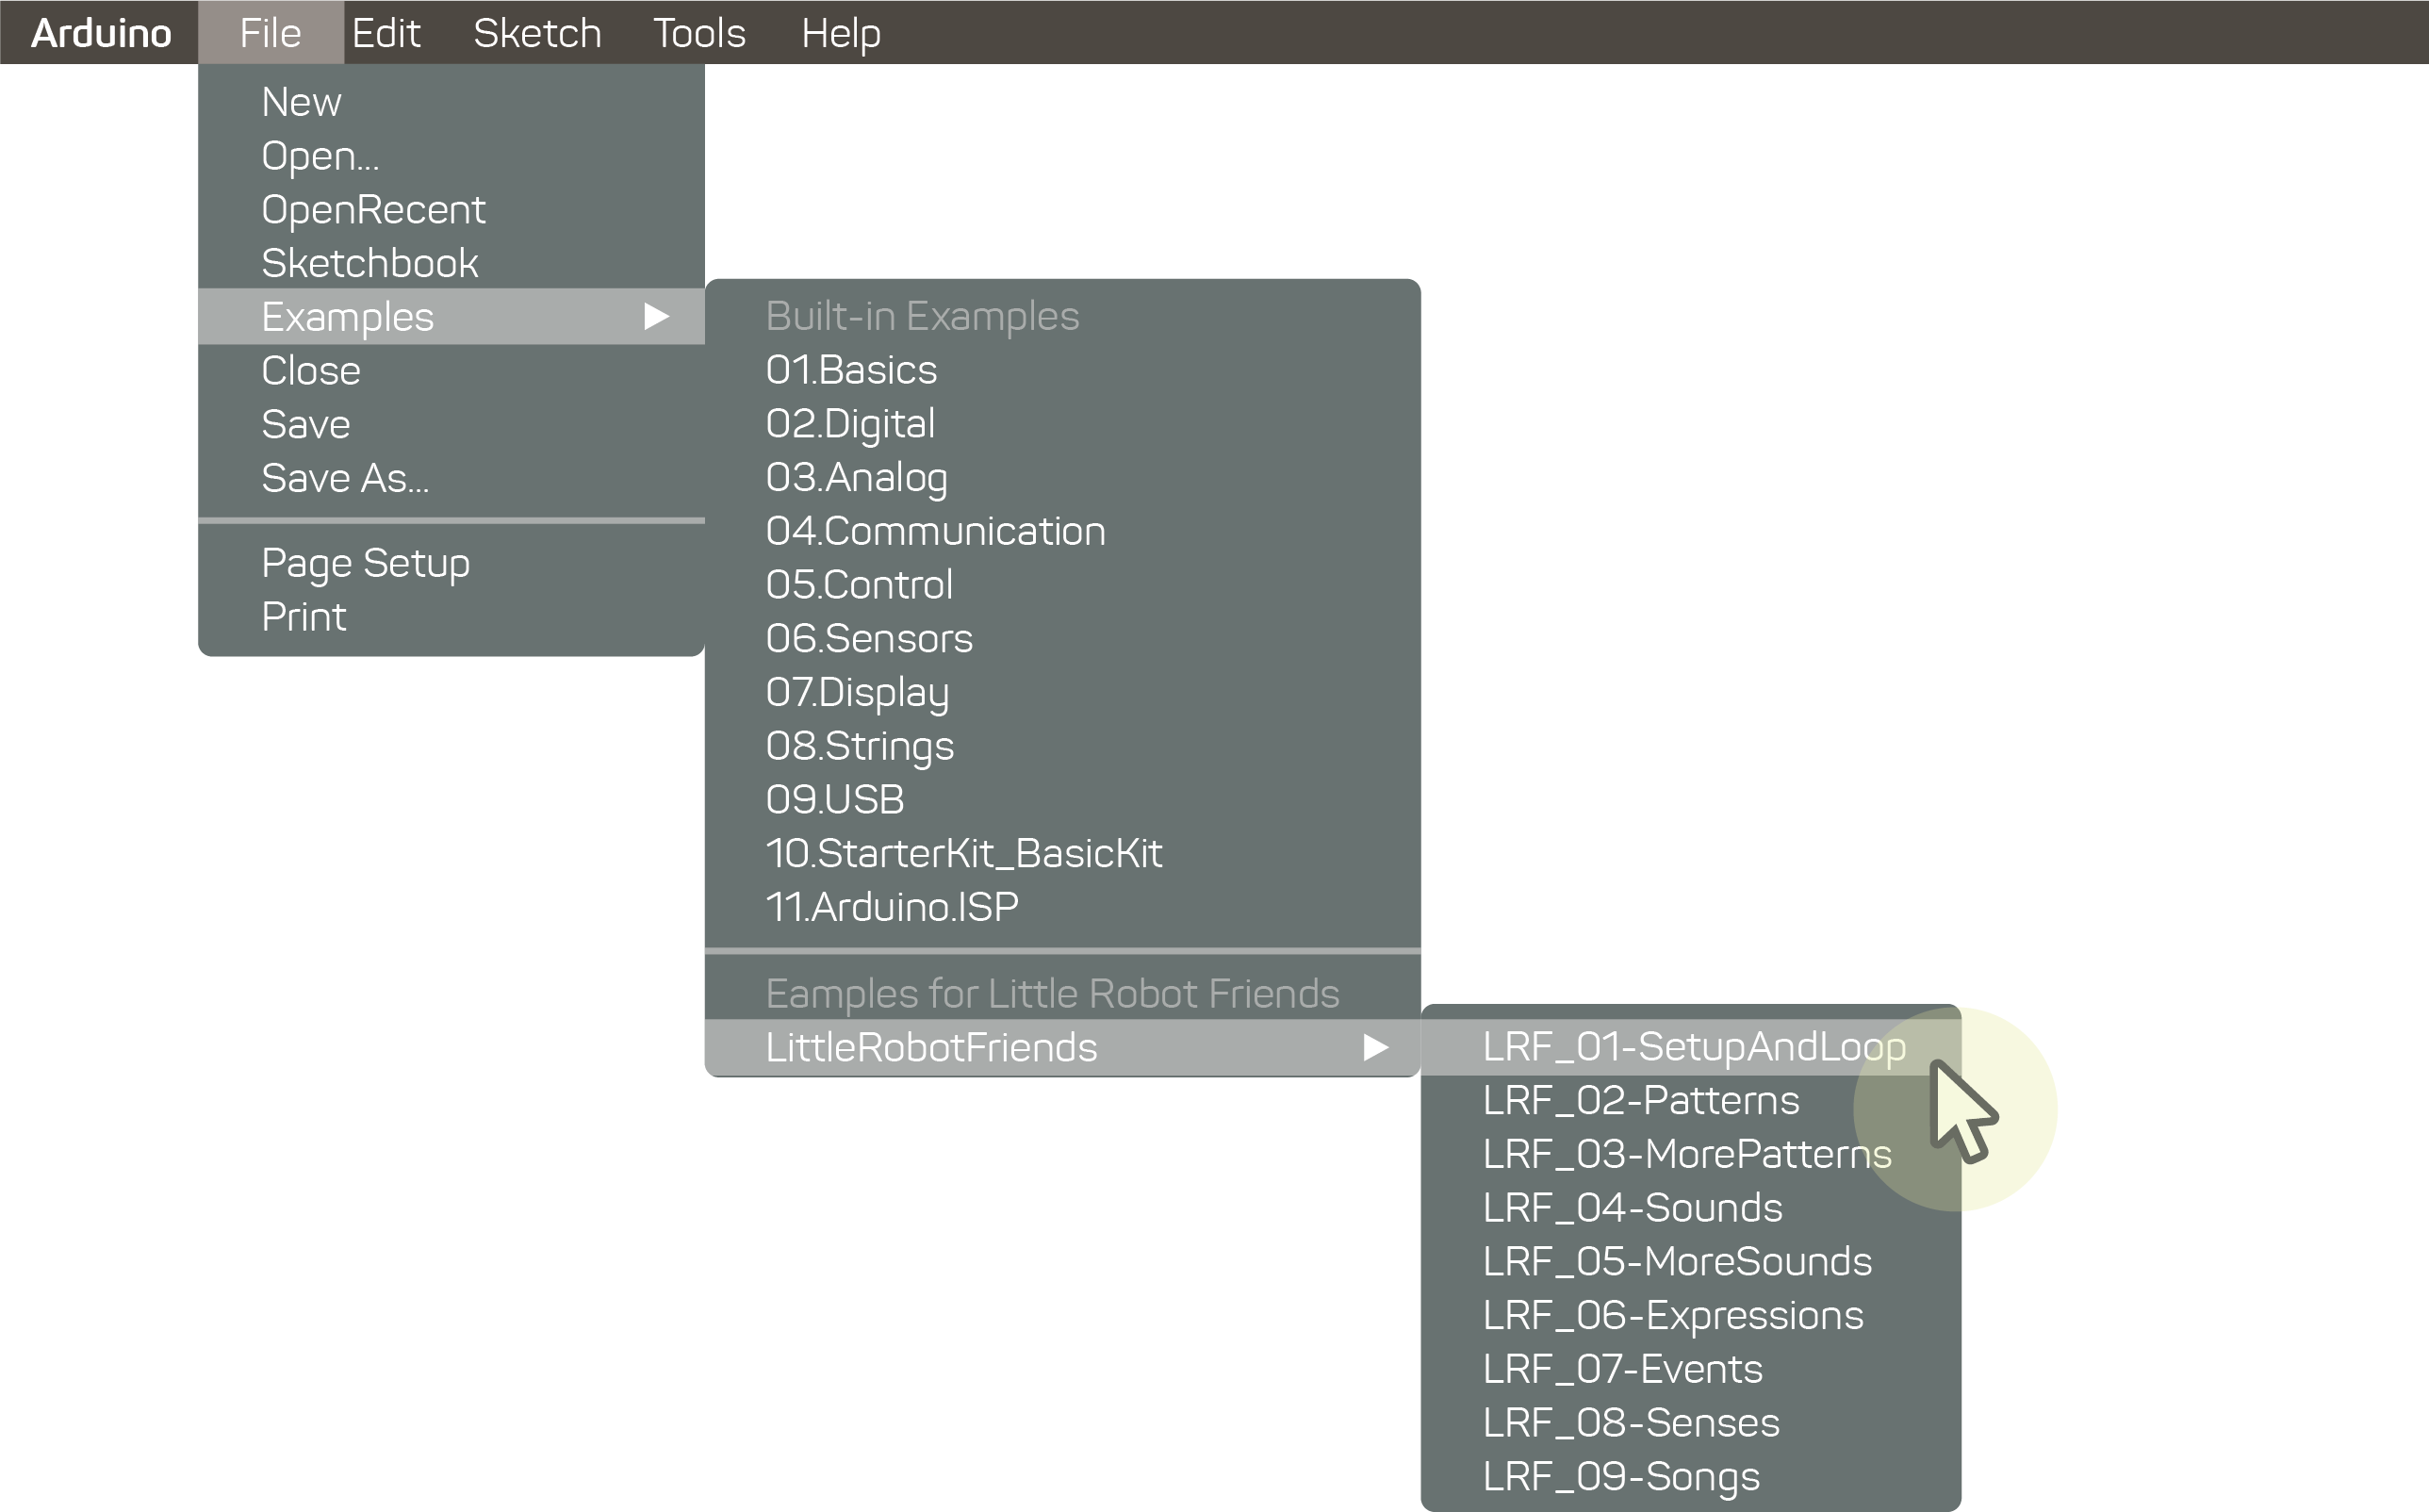
Open up the LRF_01-SetupAndLoop sketch from the Examples folder.

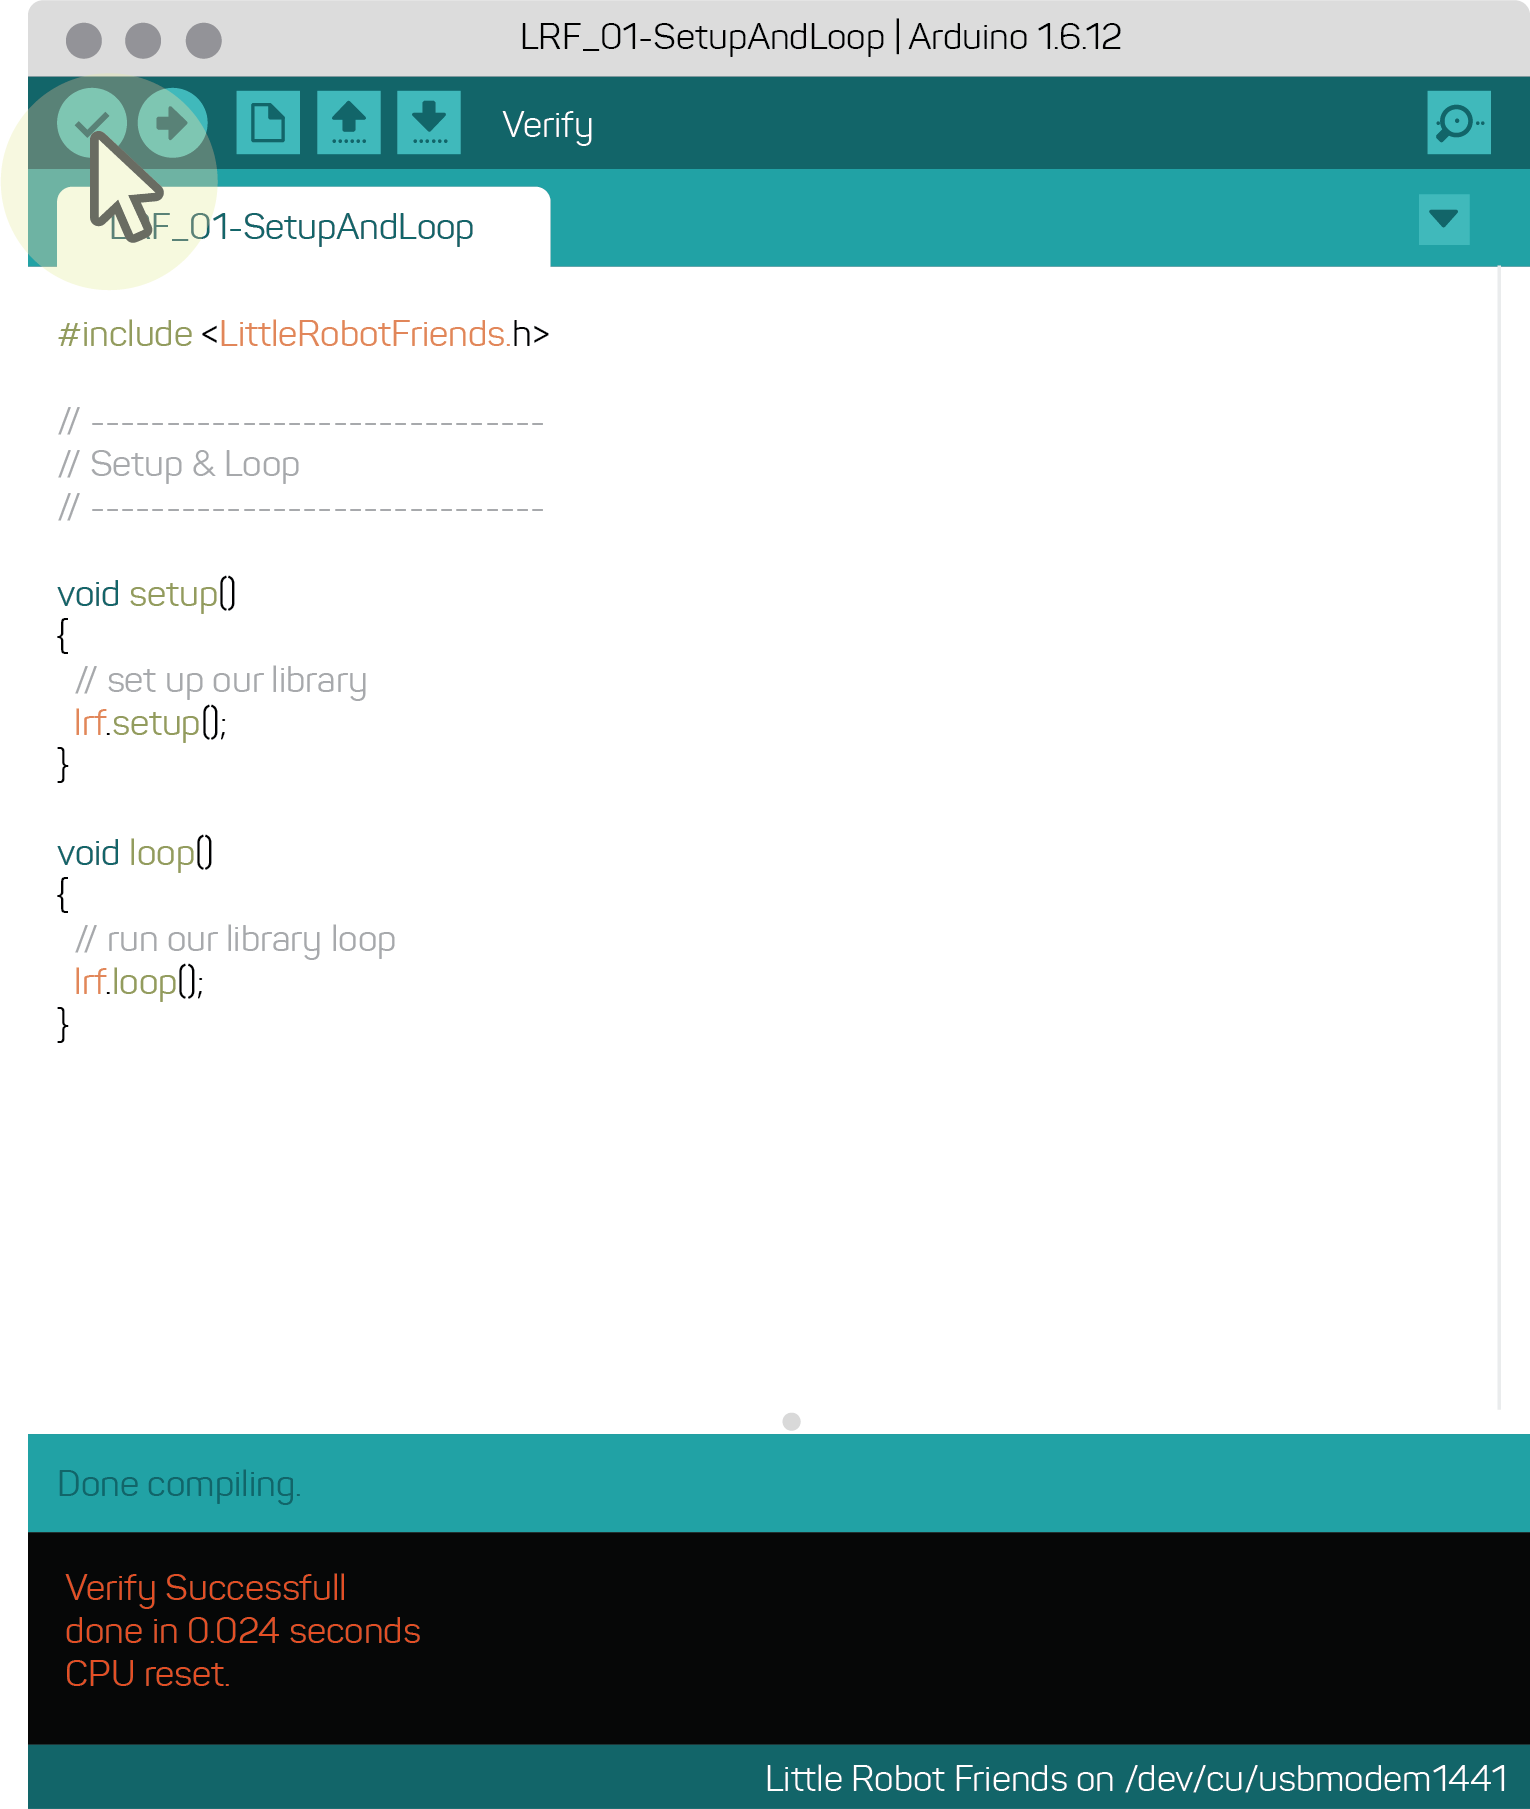
Click on the verify button to compile the program. Basically, it’ll look through your program to make sure the robot will understand it. If not, you’ll get an error message in the debug box.

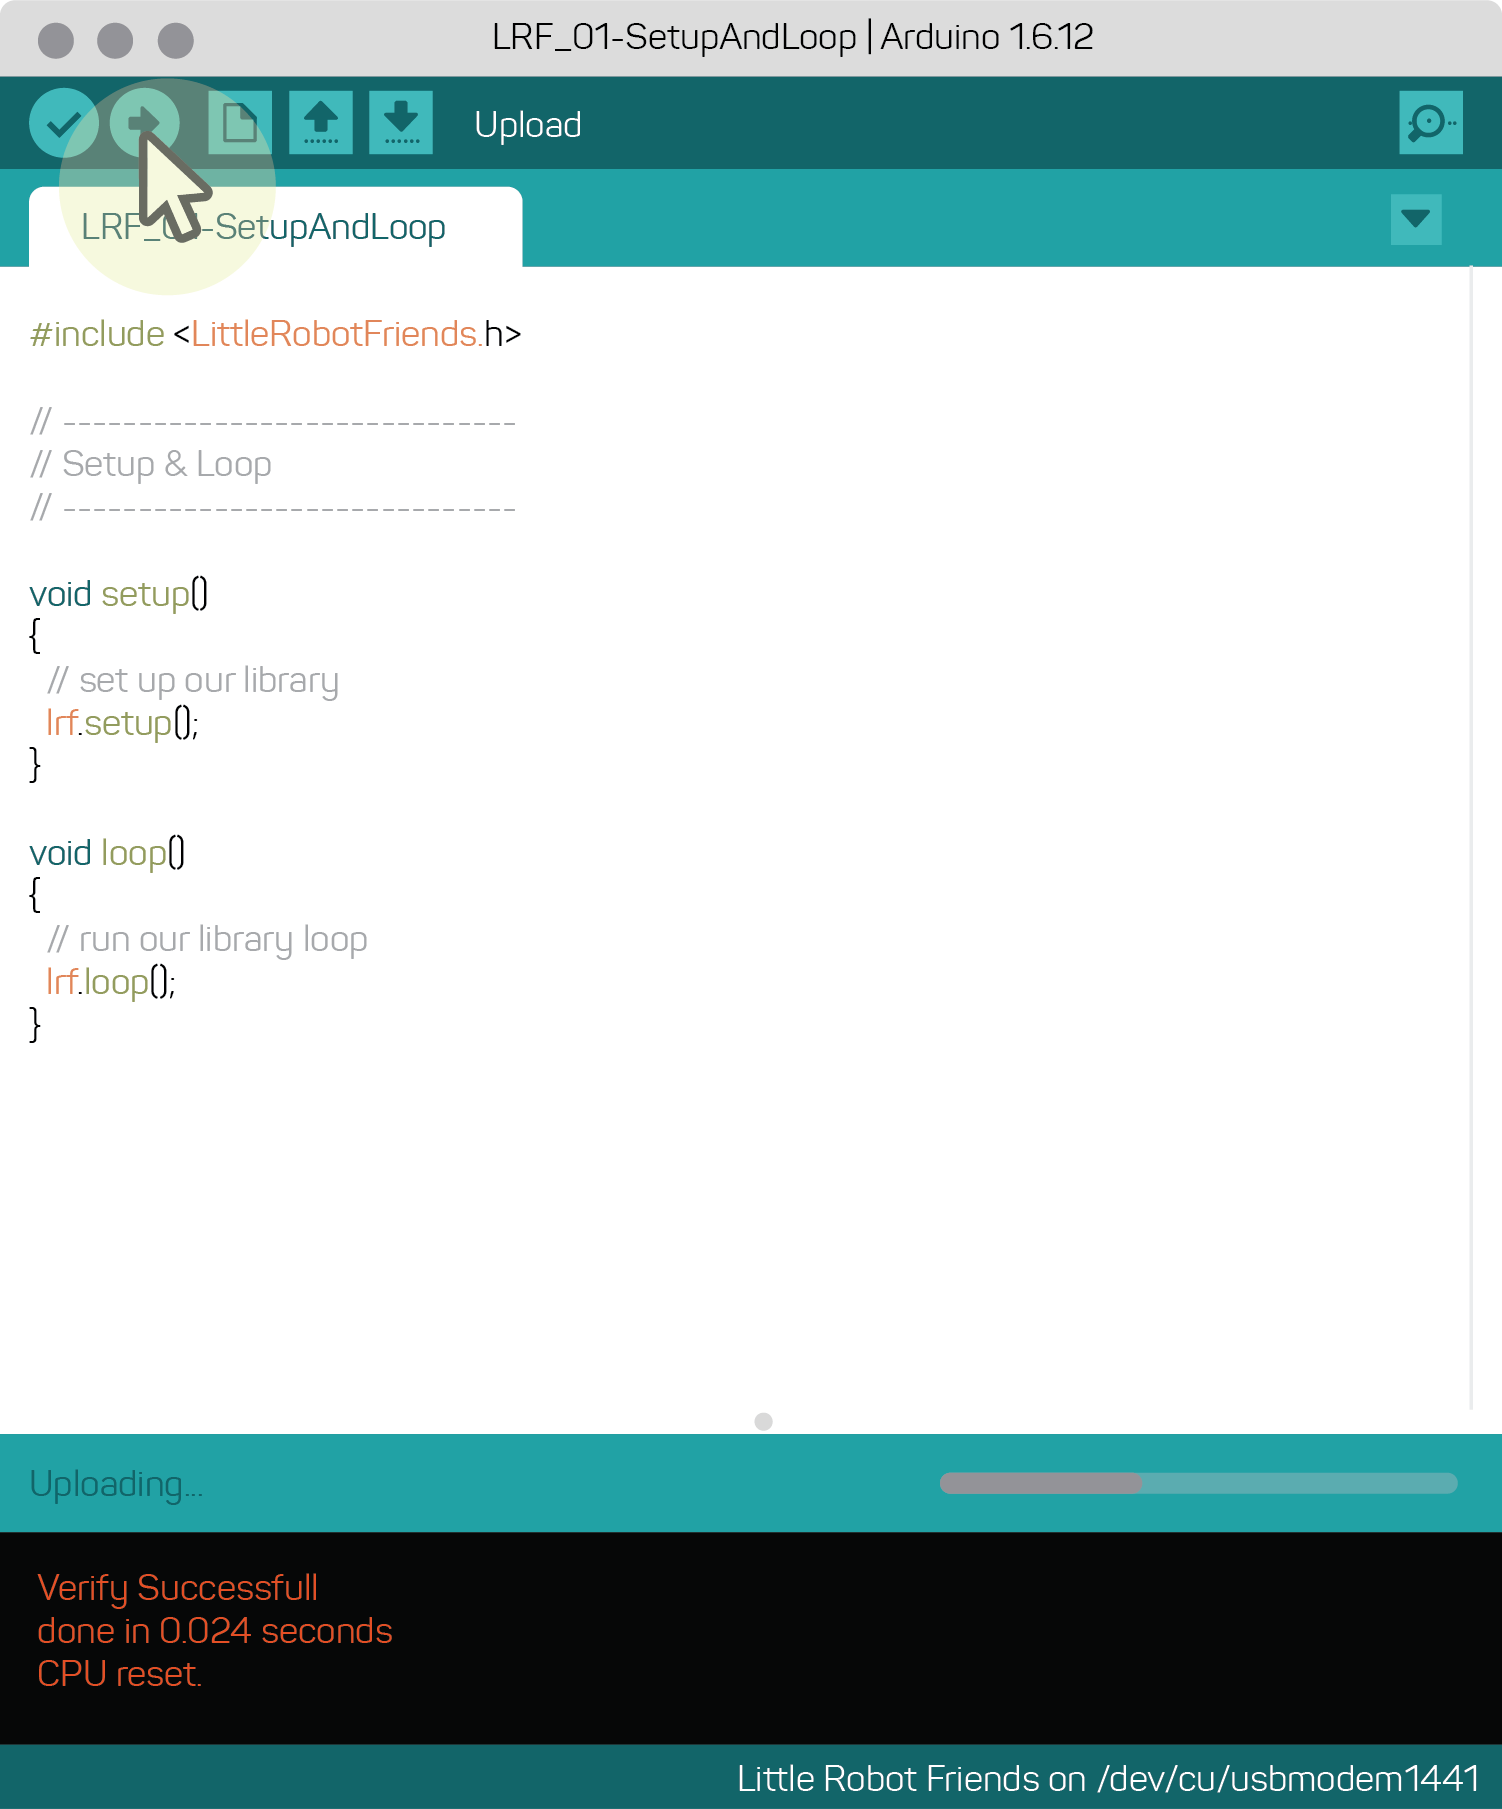
If your program successfully compiles, click on the upload button next. Your program will re-compile, search for the serial port, and send the program to your robot.

You’ll know the robot is done uploading when it plays a Power Up sound, similar to when you turn it on. Some of the trick, game, and song programs might have code that disables or overwrites the Power Up sound. If so, check the debug box to see if it is done uploading.

Congratulations! You’ve successfully uploaded your first program. Try uploading another example sketch to see what your robot can do.